Personal Training in Toronto Archery Lessons in Toronto Boxing Lessons in Toronto Ice Skating Lessons in Toronto Swimming Lessons in Toronto
Sign up for personal training / sports training by emailing cardiotrek@gmail.com.
Showing posts with label Archery. Show all posts

Five Tips for Winning an Archery Competition

Yesterday (Saturday, June 25th) I took part in an archery competition. The events in question included three categories of archery: Olympic, Compound and Barebow. Unfortunately they were short on competitors for the Compound and Olympic categories, and while I don't normally compete in such things, I agreed to take part so that they would have more competitors.

Drawing upon the experience, I have constructed a list of five tips for people looking to take part in archery competitions.

Tip #1. Understand the system being used for the particular competition you are in.

For example, the competition yesterday involved 3 ranking rounds, 3 shots per round. The results from those 9 shots (3 rounds x 3 shots per round) then determined your rank for the duels.

The rankings then determined the order of the duels, the highest ranking people facing off initially against the lowest ranking people. The winners of those duels progress to the next level, the losers duel it out to stay in the competition, if they lose round two then they are eliminated. As the duels continue, they eventually reach 4 semi-finalists, who are narrowed down to two people - the finalists.

Understanding how the competition system works will give you a better idea of how you are expected to win the competition. A dueling system like above could knock people out of the competition just by having 1 or 2 bad rounds.

In my case, there was only 3 people competing in the compound competition. So I was ranked against Randy, and then after I won that duel I faced Luis. Below are the scores during the rounds:

Charles Vs Randy

Round 1
Charles 10x 9 8 = 27 with one bullseye
Randy 5 3 3 = 11


Round 2
Charles 7 7 1 = 15
Randy 9 8 4 = 21


Round 3
8 6 5 = 19
7 6 5 = 18


Total Charles 61 vs Randy 50

Charles Vs Luis

Round 1
8 7 5 = 20
8 8 8 = 24

Round 2
4 3 2 = 9
10 9 8 = 27

Round 3
9 7 7 = 23
9 8 5 = 22

Total Charles 52 vs Luis 73

Round 3 Vs Luis. Green Fletch = My Arrows, Orange Fletch = Luis Arrows.

Tip #2. Keep track of everything you did during the rounds of the competition.

This isn't just useful for the current competition, but will help you to analyze what you did well and what you did wrong, that way you can use that information for future competitions as well.

So for example I know Round 1 vs Randy I took my time and did very well. Round 2, I rushed the shots when I should have took more time. Round 3, I narrowly beat Randy by 1 point by forcing myself to be more patient.

Versus Luis, I did okay during the first round, but during round 2 I encountered two problems. The first problem was mental, I had calculated that I needed to improve my score by at least 4 points just to catch up to Luis. This caused me to stress more about my shot and tense up. The second problem was wind, which caused me to stress more. After the first shot did so poorly I felt like I was already defeated and it didn't matter any more. By the second shot, it was clear my score was going to be dismal, thus by the third shot I had basically given up. Round 3 I recouped some of losses and even beat Luis by 1 point, but by then it was too late.

Analyzing this after the fact, you realize that what I really did wrong during the first duel was that I rushed the 2nd round when I should have been more patient, I could have got a score in the 20s had I not rushed it. And the second duel was mostly mental, and a dose of patience could have helped versus the second round when the wind was messing with my head.

Tip #3. Practice, Warmup and Tune before a Competition

I joined that competition last minute and had only practiced shooting compound once during the previous two weeks. I had hoped to arrive at the competition an hour early to do some "last minute practicing" but ended up arriving about 30 minutes before the event instead.

Had I known I was going to be taking part in the competition further in advance, I should have been practicing compound 3 times per week, tuning the bow for more accuracy, and I should have made more of an effort to arrive earlier and give myself ample time to "warm up" before the event.

In comparison Luis, the winner, regularly shoots compound and was amply prepared. I divide my practice time between traditional recurve, longbow, Olympic recurve and compound.

Thus anyone wishing to do better during a competition should be practicing the archery style in question more regularly so that they will well-practiced and well-tuned before the event. Showing up early to warmup is also handy.

Tip #4. Pace what you eat and drink.

Having a BBQ on a hot day and cold drinks may sound like a great idea for a party, but for an archery competition you would be better off eating healthier and trying to pace your consumption of both food and liquids. Obviously you want to avoid dehydration on a hot day, but you should also try to avoid over-hydration, eating too much and feeling bloated.

Since the competition yesterday was just for fun, it didn't really matter what I ate or drank during the event, but during any serious event people should try to be more cautious about their eating habits.

Tip #5. Mentally prepare yourself to prevent competition anxiety.

During the 30 minutes that I warmed up before the event I focused mostly on shooting a longer distance, so that when I was shooting at the distance at the shorter competition distance it would feel comparatively easy. I feel this did actually help.

There are other ways to mentally prepare yourself, including regular practice so you feel more confident in your skills.

Other Ways to Mentally Prepare Yourself:
  1. Choose and maintain a positive attitude - basic skill.
  2. Maintain a high level of self-motivation - basic skill.
  3. Set high, realistic goals - basic skill.
  4. Deal effectively with people using social skills - basic skill.
  5. Use positive self-talk - intermediate skill.
  6. Use positive mental imagery - intermediate skill.
  7. Manage anxiety effectively - advanced skill.
  8. Manage their emotions effectively - advanced skill.
  9. Maintain concentration - advanced skill.
Mental Skills Pyramid for Competitive Athletes

Some of the above mental skills come with taking part in competitions regularly, as experience will allow an athlete to draw upon past experiences with competition anxiety and they will be able to better cope with that anxiety.

You will also note that the above skills are useful for other kinds of competitions. Or public speaking.

Final Notes

I also won an arrow case as a door prize just for showing up, which was actually the primary reason I took part in the competition. I just wanted the arrow case right from the beginning. I had zero use for a trophy to collect dust.

Happy Competing!

10 Tips for Night Archery - How to Shoot in the Dark

Note - Hunting after dark is illegal in many provinces and states. But practicing after dark can be quite fun, especially during the summer months as the temperatures are nicer in the evening as opposed to the scalding heat of summer days.

So if you want to do night shooting, what should you be doing? Well here are 10 tips for doing some night archery.

#1. Use lighted LED nocks. If you miss the target they will be easier to find. They also look pretty awesome so that is a nice bonus.


#2. You will find it is tricky not being able to see what you are aiming at. I recommend using glowsticks, like the kind below. There are other kinds of glowing items (like bracelets), but I find they don't work quite as well because they are not as bright. I also don't recommend shooting at candles, so don't bother.


#3. Learn how to Gap Shoot. Gap Shooting is a different style of aiming, but it is handy for shooting at moving targets and also handy for night shooting. If you live in Toronto and want to learn how to Gap Shoot, I recommend signing up for archery lessons and ask to learn the Gap Shooting method of aiming.

#4. If you are using a sight for aiming, you may want to get a lighted sight that uses a LED and fibre optics to light up the individual sight pins. If you don't have one you can also find a way to add light to your sight, possibly by having a glowstick handy or even making your own homemade sight that has glow in the dark paint on it.


#5. The laser pointer target. As opposed to attaching a paper target to the target butt you are aiming at, an alternative to this is to set up a laser pointer and have it pointed at the target butt so you are basically shooting at the red dot. (If you put a piece of white paper on the target butt it will make it a bit easier to see the red dot from a distance.)

Cat laser pointers sometimes come with alternate settings for different shapes that the laser makes, so that can be fun too.

#6. Bring bug spray. Mosquitoes will be murderous late at night. Mosquito repellent will be very handy to keep the bugs away late at night. Citronella candles are also handy for keeping the bugs at bay, and also provide a bonus light source. Citronella Tea Lights plus a metal lantern would be good too.

#7. Bring a flashlight. Not necessarily to use all the time, but more for emergencies. Lets pretend you drop something on the ground and cannot see it to find it. A flashlight will be handy for such an occurrence, and also useful for finding the bathroom, preventing you from stumbling around in the dark while searching for lost arrows, etc.

A good Maglight flashlight or something similar would thus be handy. Accidents happen.


#8. Bring a Friend. Shooting by yourself is a bit boring. Having a friend to talk to is nice when night shooting. Make sure you observe safety protocol, calling live when about to shoot and clear when ready to collect your arrows. It would be bad mojo if you accidentally shot your friend or got shot while doing night shooting and you were ignoring the potential for danger, so please observe safety protocols.

#9. Dress for the temperature. Having a hoodie or similar clothing will be handy if it turns out to be chilly at night. Also handy for keeping the bugs off in case you didn't bring enough bug spray.

I thought this one was pretty awesome.
This one was amusing too.

#10. For extra fun, save your old broken arrows for the future and use them for night shooting at a lake. Bring marshmallows (optionally, you can soak them in fondue oil for a brighter flame). Stick the marshmallows on the tips of the old broken arrows, nock the arrow but only partially draw the bow - then light the marshmallow on fire and immediately shoot it up and across the lake.

Because they are old broken arrows you won't really care that you are burning them / losing them in the lake. But they will make for some fantastic fun shooting over the lake and seeing the reflection of the fire on the water.


Happy Night Shooting!

Three Ways to Combine Archery with Swimming

For those people who love finding something fun to do in the summer - and for those people who are fanatics about both archery and swimming - here are 3 ways to have fun while combining the two.

#1. Snorkeling + Target Practice. Truly for those who love snorkeling and a challenge. Balloons that are weighted down make for good targets.


#2. Archery Diving - tricky to do, but something that will be a real challenge. Not a lot of people have attempted archery trick shots like this since the 1950s.


#3. Bowfishing while Wading in a River. Not really swimming, but still something fun to do. Just need a fishing license and a bowfishing reel. Only legal during carp bowfishing season, which in Ontario is May to July.


BONUS!

#4, #5, #6. Archery Surfing, Archery Kayaking, Archery Windsurfing, etc. Just because nobody has ever done it before does not mean it is not possible to try it. For safety purposes I recommend using blunt tipped arrowheads when doing archery trick shots while doing water sports!

Happy Shooting and Swimming!

Archery, huh, yeah, what is it good for?

If you said "Absolutely nothing." you would be repeating the song lyrics, but sadly mistaken.

The mental benefits of archery are listed as follows:
  • Increased memory function.
  • Better sensory awareness.
  • Higher observational skills.
  • Increased logic skills.
  • Increased problem solving skills.
  • Increased concentration skills.
  • Increased pattern recognition skills.
  • Increased mathematical skills and numerical aptitude.
  • Spatial awareness skills.
  • Better understanding of yourself (intrapersonal skills).
  • More complex thinking strategies (eg. being able to think about multiple things simultaneously).
  • Decreased chances of developing Alzheimer's Disease and similar diseases.
  • Higher order reasoning skills.
= Archery effectively raises your IQ over the long term. With a side benefit of reducing the symptoms of senility and similar mental problems.

The physical benefits of archery are listed as follows:
  • Increased fat loss.
  • Increased strength / muscle mass.
  • Increased endurance.
  • Improved cardiovascular system.
  • Increased hand-eye coordination.
  • Increased balance.
  • Improved overall health (including your immune system).
= Archery, like many forms of exercise, has a long list of health benefits from regular exercise. Everything from a stronger heart and an improved immune system.

And lastly, the social benefits of archery - since archery tends to be a rather social activity - are listed as follows:
  • Increased linguistic and verbal skills.
  • Increased understanding of body language and non-verbal communication.
  • Interpersonal skills.
  • Increased empathy. 
  • Better emotional processing.
= Archery will cause you to make more friends. That is really what it comes down to. Any person who is remotely social will end up making new friends when hanging out at the archery range. You would have to be completely anti-social and deliberately avoiding meeting new people to not be accidentally making new friends doing this sport. It is an extremely social sport and complete strangers will often build friendships in the span of a few hours.

CONCLUSIONS

Archery will make you Smarter, Stronger and more Social. What it is good for? Lots.

Naysayers of this might also point out that bowhunting, bowfishing, competing in archery competitions are also potentially useful, but frankly those are things that limited in their application. You would have to go out of your way to deliberately hunt, fish, or compete. In contrast, the mental, physical and social benefits will effect your life on a regular (if not constant) basis, especially if you become a regular at your local archery range.

Oh and one last benefit. Archery is FUN! What other reason do you need???

The photo below was taken when myself and two friends all brought our antique Browning bows to the archery range and we lined them up to compare them. :)


Archery Testimonials x 4

#1.

"Thanks again for the archery lessons! You are the best. We tried archery tag several times but didn't really learn how to shoot properly until we met you.

To anyone reading this, Charles is an amazing archery instructor who is very patient, very good at communicating ideas, and he helped us to get rid of a lot of our bad habits. You could not ask for a better instructor. He makes the lessons fun and we learned so much every lesson.

- Amber and Muhammad"

#2.

"Charles provides quality archery instruction and service. He has good attention to detail, is nice, friendly, very knowledgeable, and I am very happy with my archery skills. They are all due to his tips which covered everything from how to stand, how to pull, WHEN to pull, how to stand up straight, how to aim, how to release and much more. I had a problem with my drawing arm that was causing me to tremble, but Charles taught me how to fix it by pulling the bow correctly after pre-aiming. I would not have thought of that. He also taught me how to use consistent power so each arrow has the same amount of power and why that is important for accuracy. I am coming back for more lessons next year.

Thank you for the archery lessons!

- Zhang Min"


#3.

"Charles is a great instructor. I took five lessons with him and each lesson is different and tailored to fix whatever problems I am having. By lesson 5 I was shooting long distances and even scored a few bullseyes. The part I enjoyed most was the drills in which he would challenge me to try new things, like moving a target ball around so I have to learn how to adjust my aim, adjusting my aim for windy conditions and shooting at moving targets. I never thought I would be able to shoot at moving targets or long distances so accurately, but now I can.

I surpassed my expectations and now have my own equipment. I am extremely happy with the lessons I received.

- Jennifer D."

#4.


"To the reader:

Before signing up for archery lessons I did my research. I did this because I want to get into traditional bowhunting and I wanted someone who understood what I was looking for. One of the things that impressed me right away is that Charles practices archery in the winter. From what I can tell he is the only instructor in Toronto who does that. He also does bowfishing, which is not the same as bowhunting, but impressed me nevertheless. I was also impressed by the amazing amount of archery tips he had on his website, all for free - which got me thinking, if that is all the tips he gives away for free, then what is he teaching? So I decided it would be worthwhile to sign up for 1 lesson. I figured 1 lesson wouldn't hurt.

Wow. I learned so much in the first lesson it still boggles my mind. He started with a safety lecture, then he did an eye test to see which is my dominate eye, then he showed me how to put together a 3-piece recurve bow (at the time I didn't even know what a recurve bow was and I kept calling it a longbow by accident). Then he did a lecture on how to aim and then a lecture on proper archery form, which covered everything from what I should be doing with my toes, my fingers and even my neck.

Then we started shooting. Charles was very careful to adjust my form each time I was shooting so I could get better shots and foster what he calls good habits. Sometimes he allowed me to make mistakes so I could see what a difference bad habits makes. By the end of the lesson I was shooting clusters at a target 62 feet away.

Needless to say I immediately asked to sign up for more lessons. The following lessons taught me how arrow spine worked and how that effects the quality of the shot, how arrowheads come in different sizes and shapes and what they are used for, how to wax a bow string, how to properly string a recurve bow, how to string a real longbow, and he gradually increased the strength of the bows I was shooting so that I was becoming stronger. He also taught me several different aiming methods, which I found fascinating.

During lesson 6 we were shooting at a paper target of a deer 165 feet away, which I found to be a lot of fun. Charles had learned that I was also interested in bowhunting and surprised me during the final lesson with the deer target. He gave me an interesting tip:

If you want to hunt then you should routinely practice at double the distance you intend to hunt at. So for example if you want to hunt at 90 feet or less, then your should regularly practice at 180 feet. This way you feel confident in your accuracy at a time when you more likely to be pumped full of adrenaline and might start second guessing your accuracy.

That was an important tip to me. But it was just one of many I learned from his lessons. What you see on his website is just the 'tips' of the iceberg. Thanks again!

- Chris W."

A Steady Relaxed Hand on your Compound Bow

What NOT to do - over-gripping the bow.
A very common beginners mistake for new archers is gripping the bow when you don't need to. Gripping the bow tightens up the forearm muscles and causes people to torque and/or jerk the bow, as well as increasing unnecessary vibrations and micro-jerking.

The best solution for preventing this is to completely relax the hand and forearm. Not even the thumb should be tensed. Everything should be relaxed. Fingers, hand, thumb, forearm, and elbow should be relaxed. Even the bow shoulder should be reasonably relaxed.

Hand position is a matter of debate however. My preference is for the base of the hand (the palm) to be bracing the bow as that reduces the chance of torquing the bow.

Some archers however prefer to angle their hand slightly diagonally, which increases the chances of hand torque. As an instructor I try to steer people away from that and I consider it to be bad form if a student is doing it because it is robbing them of more accuracy. However some archers swear by their chosen hand positions (archers are sometimes a superstitious lot) and choose to ignore physics.

The above hand position will tend to cause left-ward torquing.

Some archers also like to tuck their fingers up on the side of the handle, which again tensed up the forearm and increases the chances of jerking the bow mid-shot. Even micro-jerking (so small the human eye can barely detect) will rob accuracy. Again, some archers swear by this hand position and choose to ignore the laws of physics.

The fingers are too tense and will cause right-ward jerking.

Close, but if the fingers are too stiff, they can still cause jerking of the bow.

Another problem is people who have their fingers facing forward but they are still making them stiff or making claw fingers. Any amount of tension is going to hurt accuracy. Ideally what you want should look more like your hands do when you are standing and your hands are relaxed at your side. Or comparatively, the shape of your hand when you reach out to shake someone's hand. A nice relaxed, natural position.

Another common mistake is when archers relax only three fingers, and then pinch their thumb and index finger together. Again, any amount of tensions robs accuracy.

Please don't pinch your index and thumb together.

Claw hand plus even a tensed up pinky finger can rob accuracy.

Ideally you are going for the nice relaxed handshake position, with the base of the palm bracing the bow (not the thumb, the thumb area used as a brace increases hand torque). See the above photo and several of the photos from further above from people who favour bracing the bow against the lower "drumstick" of the thumb.

Some people only seem to have a basic understanding of what hand torque does to their shots and cannot be bothered to try fixing the problem.

Common Mistakes
  • Gripping the Bow.
  • Tensing the Fingers.
  • Tensing the Thumb.
  • Pinching Thumb and Index Finger.
  • Claw Hand.
  • Rotating the hand and bracing on the Thumb "drumstick".
  • Holding the Handle too far to the left or right (aka, not centering the hand on the handle).

HOT TIP

Comfort also seems to be a big factor for accuracy. If someone doesn't like the handle of the bow they are using, that lack of comfort will often cause them to tense up their hand when they should not be. Having a good comfortable handle therefore allows the person to relax their hand more and allows for a more comfortable, relaxed and accurate shots.

Notice above how many of the people in the photos are using the bare handle and haven't added anything to the handle to make it more comfortable. That is because they don't know any better.

What people are supposed to be doing is purchasing a better quality grip and then attaching it to their bow. Some people even make their own. Like the two examples below.


Another alternative is to wrap the handle, as desired by the user, with leather or faux leather. Some people also use braided para-cord and have experimented with other materials.

To learn more about how to shoot compound bows you can sign up for compound bow archery lessons in Toronto.

6 Tips for Tighter Compound Bow Clusters

Below are six bow tuning tips for improving the quality of your clusters when shooting a compound bow:

#1. Make sure your Nocking Loop is installed correctly.

Most compound bows these days come with a nocking loop for a mechanical release already installed on the bow these days. Most of the time they are installed correctly. Sometimes they are not. Here are some tips for making sure it is correctly installed:

(A) Make sure the loop is not pinching the nock too much while at full draw. A way to test this is to draw the bow back, arrow nocked, with no arrowhead on the arrow. If the arrow rises off the arrowrest (assuming you are not using a whisker biscuit or hostage arrowrest), then nock pinch will result in the arrow rising a bit off the arrowrest. If the arrow isn't staying on the arrowrest, then the nock is being pinched. To fix this, adjust the nocking loop so that the nock has about 1/4 or 1/3 of a mm of extra space. Some people might even give it 0.5 mm. At full draw the extra space disappears. Retest to see if you are getting arrow lift, if it is doing so, repeat the process to give the nock more space until it stops causing arrow lift when at full draw.

 (B) Check what direction the nocking loop is pointing. It should be pointing straight back away from the bow, but sometimes it could be installed crooked. The "String Torque" of it rotating back to its original position from a drawn position can result in minor fluctuations in accuracy. Sometimes if the loop is really off centre, it might even come in contact with the arrow, which could potentially ruin a shot entirely.

#2. Synchronize your Cams.

There are a variety of names for this, including synchronizing, timing, positioning, and indexing. Whatever you call it, the purpose of synchronization is to make sure the dual-cams on your bow are reaching full draw and let off at the same time. Having both cams synchronized increases speed, accuracy, consistency and the overall "feel" of the compound bow.

When synchronizing it is best to have a friend (or archery instructor) with you so that one person can be drawing the bow while the other person is checking the positions of the cams. Preferably someone who has done this before and knows what to be looking for. (It is also possible to use a machine to draw the bow for you, like a Draw Board. eg. The Lancaster Archery Supply Pro Shop Draw Board sells for $199.99, but if you are only buying it for this one task, then it is really not worth buying.)

Once you determine that one cam or the other is out of synch then all you need to do is either lengthen or shorten the cable by either twisting / untwisting the cable to change the lengths. Depending on the model of the bow you can also adjust the length of cable by changing the position of the stopping peg.

Note - Adding extra stuff on your bow strings can sometimes drastically change the tautness of the bowstring and effect synchronization, and thus hurt speed and accuracy. Thus any time you add or remove anything from the bow string / cables you should recheck the synchronization to see how it was effected.

#3. Make sure your nocks fit the bow string properly.

Sometimes people buy arrows with nocks and they are either too tight or too loose on the bow string. Both are bad for accuracy. Too tight means the bow string is pulled forward on the brace height during release. (Too tight also adds string noise by making a louder twang, which for hunting purposes could alert the prey.) Too loose could result in a misfire / the nock slipping off the bow string during a critical juncture.

Ideally what you want is a nock that isn't too tight, too loose, allows the bow string to spin freely but without torquing the arrow. If it cannot spin freely when nocked, then it is too tight. If it is so loose that the nock falls off the bow string, it is too loose.

When nocking an arrow you should hear a click sound. It should not be a snapping or twang sound. Then roll the string using your fingers and see if the string can move freely within the nocked position. Click and spin.

Another way to test for looseness is to nock an arrow, point the bow at the ground and gently tap the string. If the vibrations of the bow string being tapped cause the arrow to slip off and fall to the ground, it is too loose.

If your nocks are too tight or too loose you will need to experiment with other nock sizes until you find one that is perfect. Or the reverse is to re-serve the serving on the bowstring and make it slightly thicker or thinner.

#4. Make sure your arrow nocks are properly installed.

An improperly installed nock can sometimes be the difference between shooting the target and digging broken shards of arrow out of your arm. Hopefully that doesn't happen to you! Such accidents sometimes occur when people are shooting a nock which is broken, damaged, cracked, or my favourite word of the day: Kaputt!

But if the latter can be avoided, so can the former - improperly installed nocks. The correct way to install a nock is to wax it first (string wax works great for this) and then slide it into the shaft. Once in, align the nock as desired and it is done. That is it. Wax it and install. The wax acts to make the nock even tighter inside the shaft, and reduces the chances that it will slip out in the future or become crooked due to vibrations.

You should also regularly check the status of your nocks for damage and check the alignment.

#5. Learn how to do Nock Indexing.

The definition of Nock Indexing is simply checking to see how the nock is aligned compared to the arrow fletching vanes. It should probably be called "Nock Fletching Alignment" as that more accurately describes what you are doing. Briefly touched on above, it is simply a matter of aligning your fletching and nocks so that they are in the same position and match your arrowrest when shooting.

If you don't do Nock Indexing, your fletching will rub against the arrowrest in different ways and each shot will be slightly different.

Note - You also need to make sure that the fletching vanes are not coming in to contact with any cables while being shot. To check for this, draw back the bow for a shot, then go back down slowly to check to see if any cables make contact with the vanes.

#6. Reinforce the Peep sight serving.

I am a strong believer in this last one.

When you buy a compound bow the peep sight is usually installed for you, but the serving around the peep sight (assuming they served it!) can sometimes be loose and move around - which in turn causes the peep sight to move around between shots. To remedy this problem, reinforce the peep sight with extra serving and make sure that sucker isn't moving around on you. Having a peep sight that stays put where it is supposed to be dramatically improves consistency in my opinion.

Photo on the Right - The serving above and below that peep sight is too loose in my opinion. Minor movements up and down by even 1 mm will effect the accuracy by about 2 inches at a distance of 20 yards, or dramatically more than that when shooting at 30, 40 or 50 yards. On my bow I reinforced the serving a full cm top and bottom, and tightened it so the peep sight cannot move around at all.

Note that reinforcing the peep sight may effect the cam synchronization, so you should always do this first before doing any synchronization.

Want to learn more about compound bows and archery? Sign up for compound bow lessons in Toronto.

12 Things Every New Archer Should Do or Know

The following is a list of 12 things new archery enthusiasts should do or at least know before they begin the sport of archery.

#1. Find a good archery instructor. Your own personal Yoda.

One of the worst things you can do as a beginning archer is to try and train yourself. This leads to bad habits, and once those bad habits become entrenched they are very difficult to get rid of. It is arguably easier to train someone who is a blank slate and has not yet entrenched any bad habits.

Archers also sometimes develop bad mental habits, so having a good instructor can also help you deal with mental hangups. As you progress archery becomes less about the physical strain and more about mental conditioning.

I should also note that your instructor should be a good communicator. Someone who has difficulty communicating things to other people (due to a lack of people skills or communication skills) may have been trained as an instructor, but that doesn't make them a good instructor. People skills and communication skills are the hallmarks of people who are good instructors, as they convey their thoughts and ideas clearly and in a manner so that students can easily understand what is being communicated.

It doesn't matter who you choose to be your instructor (eg. it doesn't have to be me), but it does matter that it is someone you feel confident about their skills as an instructor. It might be a friend, a relative, a co-worker - but you might also determine that your friend isn't that good at explaining things, which is why having an experienced instructor helps. And it also matters that you do the following...

#2. Find an instructor who teaches the style of archery you want to do.

This is arguably more important than #1.

You wouldn't hire a compound bow instructor to teach recurve bow, and you wouldn't hire an Olympic instructor to teach traditional recurve. The styles of archery of separate, use different archery forms, aiming techniques, and comes with its own set of rules.

For example lets say you want to learn how to use a Mongolian style bow and how to use a thumb ring, well then you need an instructor who knows how to shoot horsebows with a thumb ring.

Myself I teach all five major styles of archery. The only things I don't teach is crossbows and kyudo. The first bow I ever shot was a compound when I was 10 years old, I made my own longbows when I was a teenager, I had Olympic archery lessons when living in South Korea, and I now teach all five styles: Longbow, shortbow/horsebow, traditional recurve, Olympic recurve, and compound.

#3. Be yourself and don't compare yourself to other archers.

Everyone was a beginner at one point and many beginners make the mistake of comparing themselves to other archers who have:
  • Been shooting a lot longer.
  • Shoot a different style of archery.
  • Are physically bigger and stronger.
  • Have better posture.
One of the best things you can do is stop worrying about what other archers are doing and focus on what you are doing. Don't try to shoot like everyone else, because everyone else is different - often focusing on different styles, and you should not try to mix styles.

Example - I know a person who bought a horsebow, but they started comparing themselves to Olympic archers and tried to replicate their shooting style (using Olympic/South Anchor instead of Traditional/North Anchor) and the quality of their accuracy went down because they were using the wrong style of archery with their bow - and consequently an inconsistent draw. Seeing the Olympic archers shoot made them think they were doing something wrong and instead of working on their traditional form, they switched to Olympic anchor and actually saw their accuracy get worse instead of better.

So please, please do not compare yourself to other archers who are shooting different styles of archery. Focus on your own style.

#4. Worry more about your technique than your equipment.

In the beginning it doesn't matter if your archery equipment is frugal or expensive. You will shoot poorly regardless. Shooting form and technique matters more because that is what builds skill, proper form and accuracy. Getting better quality equipment can come later.

#5. Archery is always harder than people expect it to be.

Especially the further you are shooting. Twice the distance isn't twice as difficult, it is exponentially more difficult.

The first things new archers learn is that is that it is always harder to pull a bow than they were expecting, and even harder to hold it steady. Next, learning how to aim (or adjust sights) is really a matter of building clusters of arrows on the target, but if your form is poor then your arrows might be all over the place with no consistent cluster - and that itself will be very difficult if your form is inconsistent due to not understanding how archery form works - which goes back to #1 and #2 above, about finding a good instructor who teaches the style of archery you are learning.

Even with an instructor it will be a hard process, but a very rewarding one as people with instructors learn way faster, break/lose less arrows, and gain accuracy. Not being able to see that increase in accuracy will feel more like defeat than a win, and thus people who are trying to teach themselves will often quit doing archery because they don't think they are very good at it.

#6. Archery does Not Come Naturally - it takes PRACTICE.

Some people even practice during the Winter.
Yes, some people have physical advantages of height, strength and good posture - but that doesn't make them naturally good at archery. Practice is the most important part, as the more you practice the better your archery form becomes consistent and the more accuracy you gain.

Thus even if you feel like you didn't do well the first time, you should also realize that you at least improved compared to the first round. Your first shots will likely be horrible. It is when you finally get an idea of what you are supposed to be doing, learn to relax more, and then you will see your accuracy improve.

In seven years of teaching archery I have had a few students who go the bullseye on their very first shot, but that is not the norm. And they never would have got that bullseye were it not for me carefully adjusting their form before that first shot occurred. It was a matter of patience that they held their shot long enough for me to fix their form, adjust their aim perhaps and then they managed to do so well because of those combined factors.

#7. When shooting compound, use the correct draw length and desired draw weight.

One of the worst things you can do with a compound bow is give it to someone who has a different draw length and a draw weight that they are not used to. They might be under-drawing or over-drawing the bow, and too much weight or not enough will feel foreign to them.

The sights will also be off because compound bows are designed to be adjusted to the user. So the draw length, the draw weight and the sights will all be off.

The same thing goes when using an Olympic bow. If the sights are set for a specific person, they are basically useless to someone who is shorter or taller.

I recall years ago watching a person teaching two friends how to shoot. The person didn't have any experience teaching, but was trying to teach their two friends, which included a tall man and a short woman. They were both using the same Olympic recurve, with the sight set up for the instructor. The tall man was comparable in height to his friend and was able to get his arrows on to the paper target they were shooting at, although not with great accuracy. The short woman however, her arrows were landing two feet below the target because her draw length was different and she wasn't getting the same amount of power as the two men, thus her arrows would arc downwards more and miss completely. The two men couldn't figure out why she kept missing so low, even though she was using the sight - to them, that was all that mattered. It was because the sight was in the wrong spot for her height. It was set up for their friend who was a good foot taller than she was.

#8. Don't rely on gadgets to get accuracy.

Form matters more than gadgets. Gadgets are crutches. A good archer can shoot the target without any need of gadgetry. Focus on learning good form and good habits, and your accuracy improves. Focus too much on using sights, stabilizers, clickers and other gadgets and you will be looking at your equipment for the mistake and not at yourself for improvement.

A good archer seeks to improve their form constantly. A bad archer blames their equipment.

#9. Try to beat your own score, but remember that score doesn't matter.

It is the sport that matters. Don't worry about trying to beat the scores of other people. Try to beat your own score and have fun/relax while doing it. Overthinking the shot, becoming tense or frustrated, these are things that will ruin your accuracy. Relaxation is key. Becoming frustrated will cause you to tense up the wrong muscles at the wrong time and ruin your shot.

Patience and relaxation are two important things for building accuracy. You will get there, but being impatient and frustrated about it will only the delay getting the results you are looking for.

This is especially important for competitive archers, as competitions often spoils the fun of the sport. No fun means less relaxation, less relaxation means you will be overly tense and ruin your shot.

"Fear is the path to the Dark Side [of archery]. Fear leads to anger, anger leads to hate, hate leads to suffering." - Yoda.


#10. If you want to get really good at archery you need to be passionate about it.

Someone who is less than passionate about archery is not going to be practicing very much. In a survival situation it makes sense for a person to be passionate about that which will bring them food, but for people doing archery for recreation, then they might only practice once per year or once per month.

Once per month will allow for a very slow progression of learning. For the truly passionate people once per month is not enough however, they crave to be practicing several times per week because they love it so much. That level of passion drives them, archery becomes an addiction to them, and they improve dramatically within a relatively short period of time because they are shooting so often.

#11. Make Practice part of your Routine.

Scheduling one or two days per week as part of your archery practice routine will allow a beginner archer to quickly build their skills quickly. Some archers may even do 3 or 4 days per week, if their work schedule allows them to be practicing that often. Once you get into the groove, it will become something you just do every week.

#12. Have Fun and Shoot for the Stars.

If you are not having fun, then why are doing this?

And if you are not challenging yourself to shoot further distances with more accuracy, then you won't really see improvement.

It is when you challenge yourself and have fun at the same time that you will see both an improvement in your accuracy and have a great time while shooting.

Even people who are training for a competition should regularly try shooting for fun and giving themselves new challenges, because the joy of a new target to shoot at is good for their mental conditioning. They will go into a competition feeling more relaxed and confident.

Coming up with fun things to try is sometimes a challenge by itself, but when in doubt try the following:

Shoot at a moving target (eg. water bottle on a string works well).
Shoot at a target at a random distance.
Shoot at a tiny target (like trying to pierce a string).
Shoot at a balloon tied to string that is pegged to the ground at a long distance. So not only is it a moving target, but it is further away.
Call your shots on a paper target (eg. Try to hit 3 o'clock on the blue or 9 o'clock on the black.)


Heavier Poundage Bows and Weightlifting for Endurance


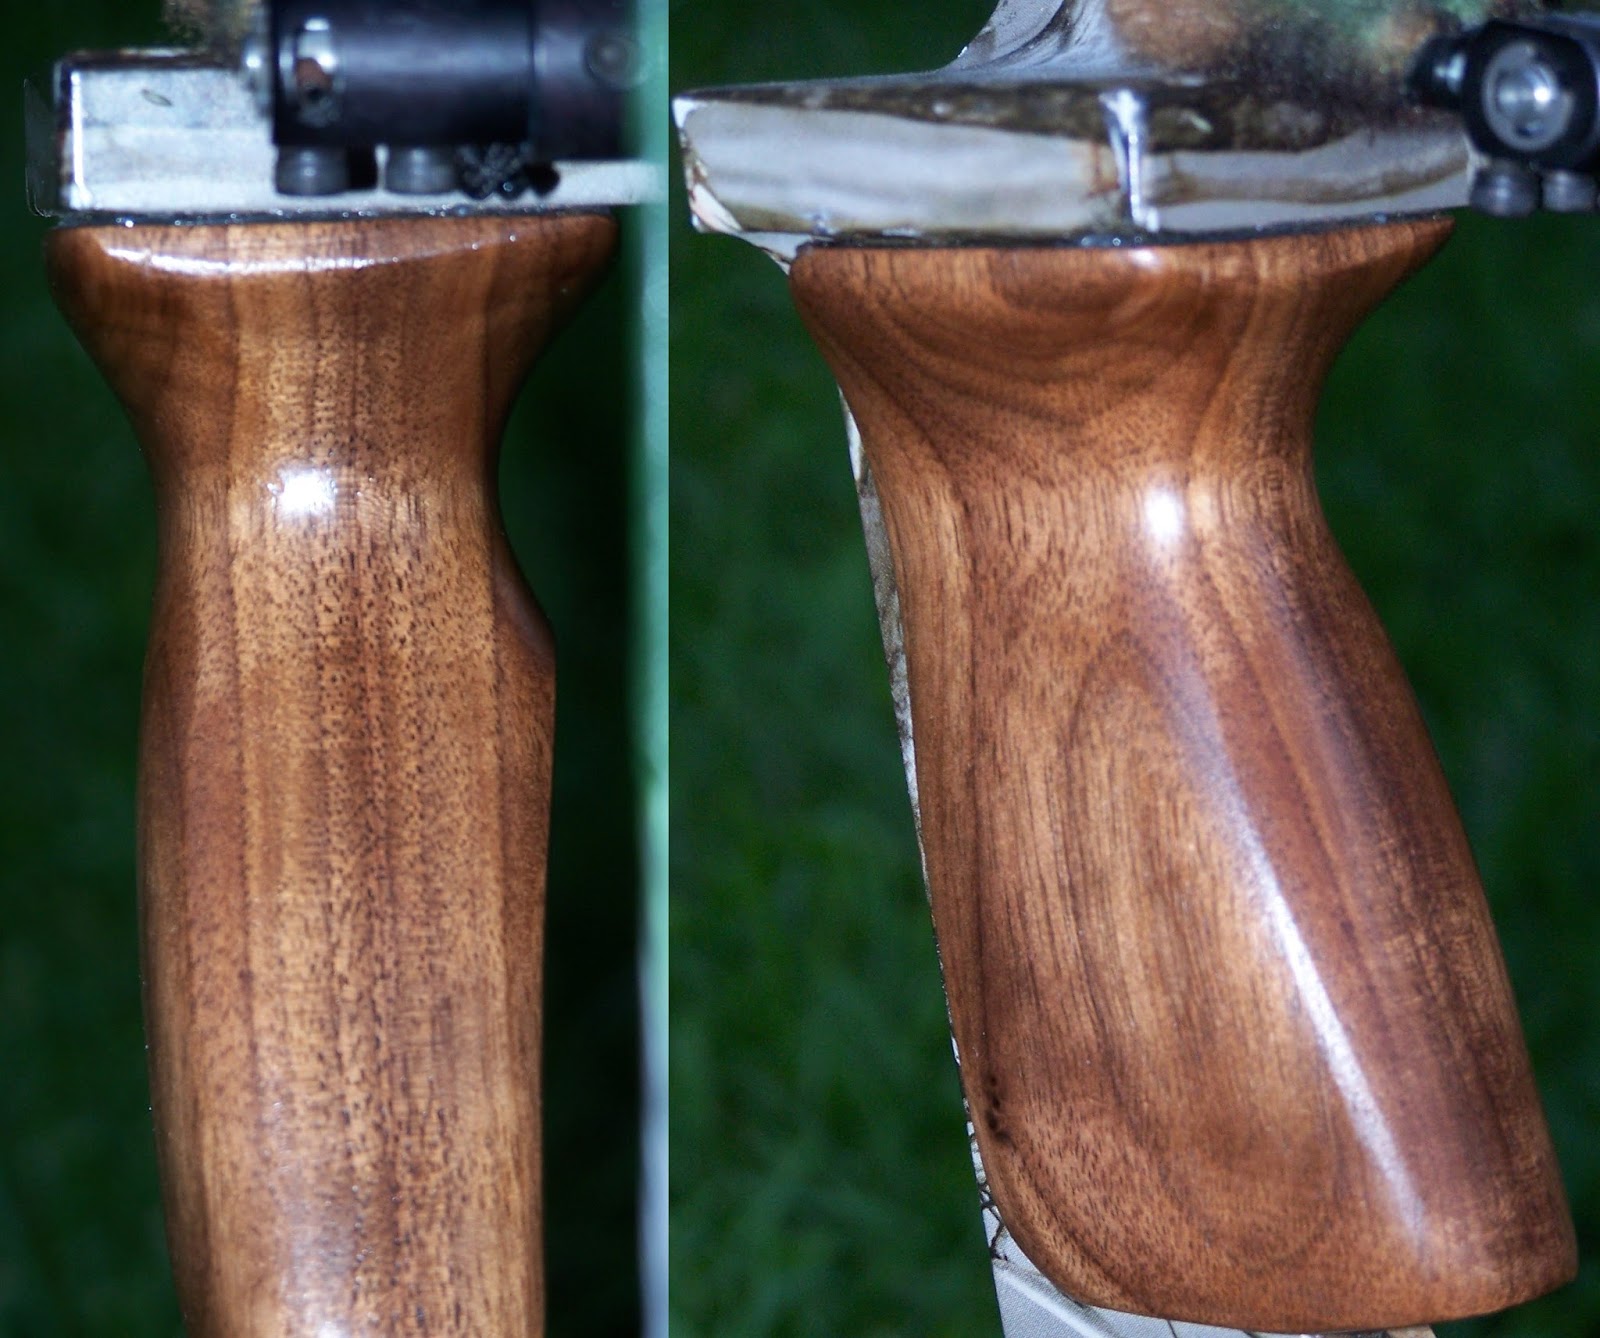
The above two shots were done earlier today with a 1975 Browning Wasp traditional recurve bow (50 lb draw weight), at a distance of 20.5 yards. Not bad for an antique bow.

The bottle itself is easy enough to hit with a light poundage bow, especially if you are accustomed like I am at shooting at relatively small moving targets.

However getting that level of accuracy (the cluster is the size of a dime) with a higher poundage bow is a true challenge because it becomes a matter of physical strength to be able to pull - let alone hold steady - a 50 lb bow.

That means that the Herculean effort of pulling 50 lbs and then holding it steady is a matter of both STRENGTH and ENDURANCE.

Hence the title of this post, Heavier Poundage Bows and Weightlifting for Endurance.

Now I have talked previously about the issues of weightlifting for the purposes of doing archery. If you want to read more on this topic I recommend reading the following posts:

10 Weightlifting Tips for Archers, Part One

10 Weightlifting Tips for Archers, Part Two

Archery as an Alternative to Weightlifting

And while those posts do talk about the benefits of weightlifting for the purposes of doing archery, it does not really talk about the issues of higher poundage bows - like those in the 50 to 80 lb range, and how to train your body to be able to pull the heavier poundages, and then hold it steady.

Thus here we go...

10 Tips for Building Strength and Endurance for Heavier Poundage Archery

Tip #1. Get a variety of different kinds of dumbbells.

Don't bother with barbells, dumbbells is what you really need for this. You need the dumbbells so you can focus on the individual muscles, both left and right, without having one side of your body compensating for the other.

You also need a variety of different sizes so you can focus on building different muscle groups, which will often require different weights in order to challenge you properly. If they are too heavy you will be less likely to execute the exercises using proper form, if they are too light they won't be challenging you properly. Thus you need a range of different weights so you can both challenge yourself and focus on your weightlifting form.

Tip #2. Like archery, weightlifting is all about form.

It might not look like it, but professional weightlifters are focusing their attention on making sure they are performing the exercise properly so they can maximize their muscle growth. If they use improper form to lift/move the weight then it is the wrong muscle(s) doing the work, which means that won't be getting the full benefit.

Take the simple dumbbell bicep curl. Done correctly the elbow is kept relatively close to the body. A common beginner mistake is for people to curve their elbows outwards to make it easier, which means they are using different muscles to help lift the weight. Done correctly, it is only the biceps doing the work.

Right: Sample image of a bicep curl. Note how the elbows are kept close to the oblique muscles on the sides and aren't sticking out to the sides.

Note - Good form also includes GOOD BALANCE. Keep both feet on the floor and stay balanced!

Tip #3. While lifting, focus on doing it SLOWLY.

A common beginners mistake when weightlifting is to do 10 reps very quickly, like it is some kind of race and you just want to get it over. However that doesn't actually help when you are trying to build endurance (or strength for that matter). Instead your goal should be to lift the weight slooooowly, hold it there, and then go back down slooooowly. This way you are building endurance more.

Doing weightlifting slowly also gives you more time to focus on the quality of your form. Like archery, shooting too quickly will effect your form. Your goal here is the same, to lift it slowly, focus on your form, and perform the exercise properly. You don't get the reward like hitting the bullseye like you do in archery, but you will see the rewards as your endurance and strength goes up after only a week or two weeks of doing the exercises.

Tip #4. Expand your focus so it covers multiple muscle groups.

"Don't put all your eggs in one basket."

Don't just exercise your back muscles. While it is true that your back muscles are important for doing archery, they are not the only muscles that archers use.

Archers use their upper back, their shoulders, their triceps, their biceps, forearms, finger muscles, their lower back, their abdominal muscles, and even their pectoral (chest) muscles. Some are definitely used more than other muscles, but that should not discourage you from exercise them. The muscles of your lower body (legs / etc) are also used for balance and standing still. Thus there is a good argument that archers should embrace a full body workout for improving their overall strength and balance.

Focusing on only one muscle or one muscle group (the upper back for example) may be helpful with one task, but creating too much emphasis on the back muscles will cause other muscles to become overly dependent on that one muscle group and the quality of your accuracy as an archer could actually go down as your shoulders and other muscles cannot hold steady when placed under the strain.

Note - It also helps to learn the anatomical terms for the different muscles. That way when you look for exercises that help your shoulders, you know that you are looking for deltoid exercises.

Thus you need to deliberately pick and choose exercises which will boost the following muscle groups:

Rhomboids (Upper Back)
Front, Back and Upper Deltoids (Shoulders)
Pectorals (Chest)
Triceps (Back of the Upper Arm)
Biceps (Front of the Upper Arm)
Forearms + Finger / Hand Grip Strength (this will mean using Hand Grips and learning how to use them properly)
Abdominals (Belly)
Obliques (Sides)
Legs

Doing all the above means you will be doing a wide variety of exercises and you should try to spread your attention across all of them equally so that the muscles are building in an uniform manner. A common mistake people do is to focus on a single muscle, which will grow up to a limitation - in order to get it to grow further, you need to spread your focus across the whole muscle group so that they all grow as they work more effectively as an unit. To do this properly however means you need to be doing individual exercises which target the individual muscles, and then to do many different exercises so each muscle or muscle group gets its fair share of exercise.

eg. Chest Flyes are really good for the pectoral muscles, as demonstrated here by Arnold:


Tip #5. Pay Attention and Avoid Sports Injuries.

Practicing proper form while exercising isn't just a matter of maximizing your strength gain, it is a matter of avoiding sports injuries. When learning a new exercise, do it slowly, do it properly, and save yourself the trouble of developing a sports injury.

A common thing amongst archers is to improperly draw their bow and then adjust their bow shoulder and drawing elbow after they have drawn back. Ideally they should be pre-aiming, then draw back in one smooth motion. Constantly adjusting the bow shoulder and drawing elbow is bad for those muscles and can lead to sports injuries. In the case of the elbow it can lead to "Archer's Elbow, aka Tennis Elbow".

With weightlifting it is the same problem. Improper lifting and bad form leads to sports injuries. So pay attention and do it properly! Don't say I didn't warn you!

Tip #6. Do More Reps to Build More Endurance.

Remember how I mentioned above to do the exercises slowly? Well here is your next challenge. Do more repetitions - still slowly - and do more of them.

Week One start aiming to do 20 reps of each exercise.

Week Two up it a little by increasing it to 25 reps of each exercise.

Week Three increase it to 30 reps of each exercise.

Week Four increase it to 34 reps of each exercise.

Week Five increase it to 37 reps of each exercise.

Week Six increase it to 40 reps of each exercise.

Now did you notice what I did? At the beginning it started off with an increase of 5 reps per week, but after it hit 30 I reduced the increase to 4, and then 3, and then 3 again. Why did I do that? Because the constant equal amount increase in repetitions becomes unsustainable. Once you real a certain point when the number of reps seems like too much, decrease the incremental amount to a more sustainable level and gradually proceed from there.

Weeks Seven to Eleven increase the reps by 2 reps per week. Doing that allows for a nice slow incremental increase in endurance, allowing your body more time to play catch up with building new muscle.

Remember also that your goal is still to be doing the exercises slowly, you should not be racing to complete them. Also note that the above schedule is just a sample. It will not necessarily fit everyone's exercise routine, and they will want to customize their increase in repetitions to fit their own needs.

Tip #7. Eat Healthy to Build More Muscle.

Any true athlete also makes a solid effort to eat a healthy amount of vegetables and protein. Avoid the sweets. You will still need carbs for energy, but focus on eating healthy and you will see faster returns on muscle growth.

Also allow yourself a cheat day (aka, a High Carb Day) once in awhile that will boost your metabolism. A higher metabolism speeds up muscle growth and boosts energy levels. Having a High Carb Day once per week will keep your metabolism from crashing. The boosted energy levels once per week will keep your metabolism higher, while you are still building muscle and keeping your diet healthy and balanced.

Tip #8. Don't Weightlift Every Day when you are first starting out.

A common beginners mistake is to be weightlifting every day in an effort to build muscle faster. However the problem here is that you end up ripping muscle tissue (hence the term "ripped") and it takes 48 hours (sometimes more) to heals properly and build new muscle tissue.

Thus if you rip the muscle tissue, it repairs a bit and builds new tissue while you sleep, and then you rip it again 24 hours later when it is not fully healed and new tissue is not properly grown, what happens??? The answer is that any new muscle tissue rips again, and you've just wasted any growth you could have potentially had.

Instead here is what you should be doing. Weightlift every two days. eg. Monday, Wednesday, Friday. Give yourself 48 to 72 hours between weightlifting sessions so the muscles can heal and grow properly. A Monday, Wednesday Friday schedule for example allows you to be building muscle over 48 hour periods twice per week, and an extra long 72 hour period over the weekend.

Tip #9. Sleep!!!

Getting a good night's rest is extremely important for weightlifting and building muscle. Your body only builds new muscle tissue while it is at rest, and the most effective form of rest is sleep. If you are not sleeping properly, then you are not healing properly.

Tip #10. Motivate Yourself to Weightlift Regularly.

This is arguably the most important part of weightlifting regularly. If you only do it for two weeks and then stop doing it, then any gains you made will slowly disappear. Becoming an Avid Weightlifter is about making a lifestyle change so that weightlifting becomes part of your weekly schedule, so that eating healthy and getting a good night's sleep is also part of your routine.

Building strength and endurance will boost your archery accuracy with the higher poundage bows, and you will see benefits with your health, your emotional independence / confidence, and even perks for your sex life. (For both men and women.)

How you choose to motivate yourself to make archery part of your weekly schedule is really up to you. You could:
  • Hire a personal trainer who understands the value of weightlifting.
  • Hire an archery instructor who also teaches weightlifting techniques.
  • Listen to music while weightlifting.
  • Watch your favourite TV show while weightlifting. (My preference is Game of Thrones.)
  • Reward yourself emotionally after weightlifting. (Never reward yourself with unhealthy foods.)
  • Practice weightlifting with a friend or family member so you keep each other motivated.
Still need more ideas for how to Motivate Yourself? Good thing I have long list of posts on the topic for you to browse.

BONUS TIP

During the off season for archery (Winter) try to make an effort to do weightlifting to keep your body in good shape so that you are in excellent shape when Spring comes, and then once Spring does come make the effort to keep weightlifting so you can continue to improve your physical capabilities.

You don't need to do your weightlifting outdoors during the Winter like the fellow below, but hey, to each their own.

Optional Archery Equipment, Need or Don't Need

There are many things that not optional when doing archery. For example the bow, arrows, bowstring, shooting glove or tab. All the basics.

But there are also lots of optional items that not all archers get. Or sometimes decide to make their own, as many archers have more of a Do-It-Yourself approach to some of the more optional equipment they know they don't actually need.

#1. Archery Backpack or Case.

Like the pink and black one below. Many different options out there for colours, designs, etc. In theory you could always just use a normal large backpack however. Having a specially made one is not a necessity. Years ago I even looked into having a wooden case for archery equipment made, similar to the one further below.


#2. Bow Sock.

A bow sock can also be used to transport your bow, and only your bow. It is basically exactly what it sounds like, a very large sock made for carrying your bow inside. The one below was made by someone on Etsy apparently. To make your own a quick way to do so is to employ an old scarf, sew up one side of the scarf together, and sew the bottom together. Add a handle or shoulder strap (or both), voila it is done.


#3. Paper Targets.

It isn't necessary to have a paper target to shoot at. Many people I know in Toronto shoot at brown Tim Horton's lids. Or if they are like me, at objects dangling from a string because they love the challenge of a moving target.


#4. Moving 3D Targets.

So optional I almost forgot to add this in here. There are many ways to make your own moving 3D target. I favour a low tech approach, but other people have gone full DIY mode and decided to have motorized moving targets like the two examples below. And further below that, a set of round throwing targets.


#5. Armguard / Bracer.

There are some extremely decorative armguards out there, but it doesn't have to be fancy. It just has to work.


#6. Hip Quiver.

There is no rule saying you have to buy a fancy Easton or Hoyt hip quiver. There are traditional designs available, and many people go the DIY approach as well. I personally hate quivers and avoid them entirely.


#7. Back Quiver.

If you do decide to get a back quiver, at least try to get one which makes it easier for you to get your arrows out of it quickly and without breaking your spine. Try to get one with adjustable straps so it is easier to use. Tip - Roll up some fur or faux fur and stuff it inside your quiver, it will prevent your arrows from rattling around or falling out of the quiver so easily.


#8. Ground Quiver.

Ground quivers are one of the few quivers I do like. Sometimes also called a Field Quiver, they are designed to hold your arrows for you when standing at the firing line.


#9. Bow String Dampeners.

Sometimes also called String Silencers. Dampeners are often made of fur, yarn, plastic or other materials. Plastic is the most common these days. The purpose of dampeners is to reduce the amount of noise your bow makes when it is shot. I favour fur myself, but hey, I am a traditionalist.


#10. Stabilizer.

Stabilizers come in two main styles. Hunting and Olympic style. Hunting Stabilizers are shorter, often heavier, and commonly used on compounds but can also be used on recurve bows. Olympic Stabilizers are primarily used on Olympics recurve bows and are significantly longer and sometimes come with side stabilizers which give it a Y shape. There are also recreational stabilizers and people who make homemade stabilizers. Like many things in the world of archery, they often come in a variety of colours too.


#11. Decorative Limb Skins.

This is something you add to personalize your bow a bit in terms of appearance. Camo is a popular choice for hunters, despite the fact that deer are colour blind and only notice motion.


#12. Decorative Wooden Handles.

These are usually more for compound bows, but it really depends on the type of riser being used on the bow as some other types of bows may be compatible if the riser is designed to take them. They are not necessarily wood either, they might be made of faux wood, plastic, carbon fibre, etc.


#13. Wrist Strap.

These are to prevent you from accidentally dropping your bow. I never use mine - mostly because I never drop my bow in that manner, so for me it is unnecessary. Look at the silly person below, he is wearing two of them. Is he worried one of them is going to break?


#14. Portable Archery Target.

Lots of people like using portable archery targets, but mostly hunters. I personally favour an archery target ball like the one further below made by Rinehart. I like throwing it at random distances and practicing figuring out where to aim at strange distances. It also works well on unusual terrain like shooting downhill or uphill.


#15. Bow Racks and Bow Stands.

Bow racks come in two varieties, those that stay at home for storing your bow(s) on (partially for display purposes), and those you take to the range with you for holding your bow when you are not shooting it - which are properly known as Bow Stands. Bow Racks are usually for storing multiple bows, usually at home. Bow Stands are more commonly used at the archery range, and usually with only one bow on it.

Bow Stands for Recurve Bows

Bow Rack at Home
After reading this you will probably have seen some things that you might want or have decided that you don't need for your own personal use. To each their own. Archery is very much about making personal decisions as to what kind of archer you want to be.

Want to learn more about archery? Sign up for archery lessons in Toronto.

Happy shooting!
Looking to sign up for archery lessons, boxing lessons, swimming lessons, ice skating lessons or personal training sessions? Start by emailing cardiotrek@gmail.com and lets talk fitness!

Followers

Popular Posts

Cardio Trek Posts