Personal Training in Toronto Archery Lessons in Toronto Boxing Lessons in Toronto Ice Skating Lessons in Toronto Swimming Lessons in Toronto
Sign up for personal training / sports training by emailing cardiotrek@gmail.com.

3 Ways to get into Archery

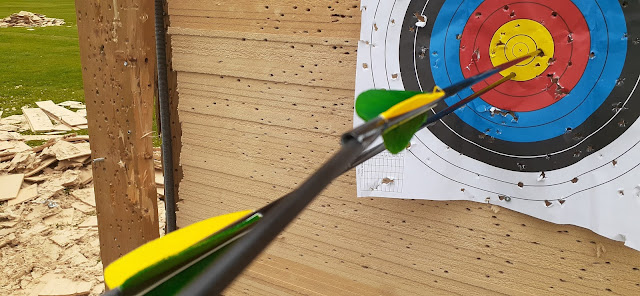
If you have never done archery (or have very little experience) there are essentially three ways to get into the sport.

 #1. Get Archery Lessons

Obviously this is me tooting my own horn, but if you're looking for archery lessons in Toronto then I invite you to contact me to book archery lessons. Archery lessons are the fastest and easiest way to learn the sport, but they are more expensive and thus geared towards people who are more serious about wanting to learn archery in a hurry and want to excel at it.

If you have a friend who does archery they can also try to teach you, but this is often a test of patience on their part as they may not have a lot of experience teaching archery (or anything else). So when getting archery lessons I do recommend hiring someone with a lot of experience teaching archery and know what they're doing.

Speaking for myself: I have been teaching archery since 2009, and I have been doing archery since 1989.

#2. Buy an Archery How To Book

The book I currently recommend is by my colleagues Steve Ruis and Claudia Stevenson: "Precision Archery".

You can try to find the book at your local bookstore, and if they don't have it then you can order it from the store using the ISBN number... Or order it online.

ISBN 9780736046343

And if you want to go a step further you can also get yourself a subscription to Archery Focus Magazine, which gives you access to their back catalogue of magazine PDFs.

Which coincidentally also gives you access to various articles that I wrote for Archery Focus Magazine:

  • "Marketing Strategies for Archery Coaches", July 2017.
  • "A Lesson in Adaptive Archery", July 2018.
  • "Teaching Archery Through Narratives", November 2018.
  • "Rinehart Target Balls (and Alternatives)", January 2020.
  • "Archery Trick Shooting", September 2020. 
  • "Gap Shooting: Aiming for Versatility", November 2021.

 Oh and I am working on my own nonfiction Archery How To Book. So stayed for that to be released.

Note - Reading a book about how to do archery isn't perfect. Ideally you want an archery instructor, but if you don't have one then a book is the next best thing. There are other books on the subject, but "Precision Archery" is the best book currently available in my opinion.

#3. Teach Yourself / Watch YouTube Videos

I have a low opinion on the subject of YouTube videos teaching archery and while there is the potential for someone to learn that way, I firmly believe it is a bit like "the blind leading the blind" because often the people making such videos are beginners themselves.

Or if they are experienced archers they're not necessarily good at teaching it or explaining it properly.

And then there's the YouTube feuds...

For example, there are two specific YouTubers I am thinking of who argue back and forth in their videos about the proper way to do something. Just two men (and their egos) arguing.

Honestly, rather than watch YouTube videos you might be better off just being completely self taught, assuming you cannot find a book on the subject or cannot find an archery instructor.

Being self-taught really comes down to practicing regularly and socializing with other archers, because you will learn so much about the sport by talking to your fellow archers and observing them while they shoot to see what they are doing correctly, but also what they are doing wrong. If you can learn from their mistakes and triumphs it will speed up the process of teaching yourself. (Of course, you would learn even faster if you had an instructor to teach you what to be looking for.)

Conclusions

A combination of options #1 and #2 above is arguably the best you can do. Getting both an instructor and the aforementioned book on the subject, so you get the best of both worlds.

Or options #1 and #2 and buy a whole library of archery books (which is what I have on my bookshelves). In some cases I even have multiple copies of the same book, the result of people gifting me books that I already have copies of.

"Hey, there's an archery book! I should get that for Charles!"

And unfortunately I have copies of almost every archery book in the English language. Plus I am such an archery dork that I write nonfiction (and fiction) on the subject.

And I have 5 different books just on the subject of bowmaking and arrow making.

So yes, if you want to get really good at archery... Just copy everything I've done. Get archery lessons, buy ALL the books (even the bowmaking books), practice multiple days per week, get really good at it, learn multiple styles of archery, become an archery instructor, and of course publish articles on the subject... And start writing a How To Book on archery.

Whatever.

I think the point I am trying to make (again and again) is that you should either get archery lessons or buy a book like "Precision Archery". Or both.

Practice makes perfect. Aim small miss small. Have Some Apple Pie.

What is Powerlifting?

Powerlifting is a Competitive Weightlifting Sport that focuses on three main lifts. Historically these lifts evolved from a variety of strongman lifts known as "Odd Lifts", but later became standardized as the sport of Powerlifting evolved and became standardized to three main lifts:

  1. The Squat
  2. The Bench Press
  3. The Deadlift

Athletes competing in Powerlifting have the goal to lift as much weight as possible during each lift, which themselves are each compound movement requiring multiple muscle groups and are therefore challenging to do. The maximum amount of weight lifted for each of the three lifts is added together giving the athlete their total in points. Whomever scores the overall highest total is the winner of the competition.

Thus an athlete could potentially score 2nd or 3rd in all three categories, but so long as they score more points than the other competitors then they are the winner.

Competitors are divided into groups based upon their gender, weight and height, thus keeping the competition at a level playing field.

The precise rules can also vary on the organization, with the primary difference often being whether competitors must compete while "equipped or raw". Equipped means they are competing while wearing reinforced clothing such as knee wraps, back braces, bench press shirts, and powerlifting singlets, which are made of very thick reinforced polyester or Lycra. They aren't comfortable, but they give the lifters a tiny advantage over people not wearing them. Raw lifters aren't allowed to wear any such clothing or aids.

Ignoring such aids, the athletes need to focus on the quality of their form. Failure to execute the lifts using proper form and technique can result in serious injuries. So pay attention, it is very important that you learn how to do these lifts properly so you can avoid injury.

It is also highly recommended that you do these exercises with a spotter in case you get into trouble.

The Squat

Rack a barbell at the correct height for your stature and load up with the required weight that will provide a challenge, but if you're just starting out try to make the challenge relatively low.

When performing the squat, ensure that the barbell is located high up on the back of your shoulders, but below your neck.  Make sure it’s not resting on your neck because that much weight on your neck/spine could result in a serious injury.

When you un-rack the barbell you want to squat down while keeping your chest up, back straight and face forward until your hamstrings are parallel to the floor.  Do this in a slow and controlled way to avoid injury. You also want to be certain that you reach parallel, which is important in a competition because otherwise you just wasted all of that effort and it won't count unless it is parallel.

When returning to a standing position you want to power up quickly and lock your hips to finish.

The Bench Press

Using a competition bench press, you first rack your bar and load with the required weight.  Place your back on the bench and your eyes directly beneath the bar.

Keep your feet flat on the floor, unrack the bar and keeping it close to you, slowly lower the bar until it reaches your chest.  Then push back up to the top position and rerack your bar.

It sounds easy, but is harder than it looks because it uses multiple muscle groups to complete the motions.

You definitely want a spotter when practicing the Bench Press.

The Deadlift

Start by loading up a barbell which is located on the floor.

Keep the bar close to your feet, bend at the waist and grab the bar with both hands, keeping them shoulder width apart.

With your back straight, chest up and face forward, slowly stand up keeping the bar close to your shins.

Lock your hips (push them forward) as you reach the top of the movement – this is important in a competition because otherwise you won't be considered to have finished the lift.

Note

You don't have to compete to get into Powerlifting. Some people do Powerlifting just as a way to stay fit or gain muscle. Some people also just like the challenge and want to set goals to see how much they can lift.

5 Bodybuilding Tips you can do Today for $0

Let's pretend you want to start bodybuilding or weightlifting today, but you don't have the budget to go buy fancy equipment or get a gym membership.

With a recession looming and rampant inflation, now is a good time to invest in BUYING NOTHING, but instead making use of the muscle between your ears to start weightlifting today without having to spend a penny.

 #1. Bodyweight Exercises

You don't need fancy equipment to do the following exercises:

  • Sit-Ups, 8 sets of 12
  • Push-Ups, 8 sets of 12
  • Squats, 8 sets of 12
  • Jumping Jacks, 8 sets of 12

Admittedly the jumping jacks will feel more like cardio, but you're still technically lifting your body during the process.

#2. Less is More, sets of 8 to 12 reps

Start with doing 8 sets of 12 repetitions of each exercise you are doing. So 96 total.

Every 3 weeks of doing these exercises you can change the number of sets and repetitions as follows:

  • 9 sets of 11
  • 10 sets of 10
  • 11 sets of 9
  • 12 sets of 8

So the volume stays roughly the same, but the focus at the beginning is on endurance, while as you progress it becomes more focused on strength. It is assumed that after 3 weeks of doing the same exercise that your endurance should have gone up by now. You should also be a bit bored and looking for a change and wanting more of a challenge.

If you're really desperate for a change you can jump two stages instead of one, or possibly progress to the next stage every 2 weeks instead of 3.

#3. Look around your home for Old Exercise Equipment

Chances are likely you already have some equipment laying around the house, possible yours or your spouse's, or roommate's. Ask if you can use the equipment. Ideally you will be looking for the following items:

  • Dumbbells
  • Barbells
  • Kettlebells
  • Chin-Up Bar
  • Exercise Mat or Yoga Mat
  • Weightlifting Bench

With those you can do a variety of weightlifting exercises.

But you can also make do with other items that you find around the house. Don't have any weights? Fill a cloth grocery bag with books and lift that instead. Or a bucket of water. Or a sack of flour. Small children...

#4. Ask Friends and Family for Old Exercise Equipment they don't use any more...

Tell them you made a New Years Resolution to exercise more and are looking for donations of any exercise equipment they don't need or use. IE. Exercise equipment they probably would've thrown away eventually anyway.

Not all the equipment people give you will necessarily be meant for weightlifting or bodybuilding or powerlifting, but you shouldn't turn down anything you can potentially use for exercising. Eg. If someone offers you archery equipment, take it because archery is a great way to build your upper back muscles.

If someone gives you something that you really cannot use try trading it for different exercise equipment via Craigslist or Facebook Marketplace or similar websites.

#5. When Exercising focus on Form and Safety

Do the exercises properly. If you're not sure how to do the exercise properly consult YouTube or various websites on the topic. You don't need to spend $$$ on personal trainers in order to learn how to do an exercise properly.

Do the following:

  • Be cautious.
  • Don't overdo it.
  • Learn the correct form.
  • Be patient.
  • Start small, build gradually.

MORE TIPS!

Eat lots and eat healthy. Don't be afraid to eat too much. It is more important that you eat lots of healthy food so that you have plenty of nutrients and protein to build muscle.

Got vitamins you should be taking? Start taking them daily.

Eat more often to replenish your strength and energy levels.

Avoid junk food.

Rest and recover.

Learn how to do compound lifts/movements properly.

Find a program that fits your needs.

Stick with it!

Only train 3 to 4 days per week.

Alternate leg days and upper body days / different muscle groups so that muscles have more time to recover and grow.

Take scheduled breaks.

Don't be afraid of (healthy) snacks. If you're hungry, eat something!

Practice the mindset of an athlete. Think of yourself as being "in training".

Better to eat too much protein than not enough.

Creatine Monohydrate (found in red meat), but you can also buy supplements. They're not cheap however. I swear the price has doubled in the last 20 years.

Fish Oil or Krill Oil, not only good for your brain, health, lowering cholesterol, etc, but also good for building muscle.

Best Home Gym Investments for Strength Training

Getting a daily workout in during a busy schedule is always a challenge. Between work, school, and family life, finding time to spend in the gym is almost impossible. But, since exercise is the most beneficial thing you can do for your health and is entirely within your control, you know you just have to find a solution.

One solution to this common problem is to work out at home. Creating a home gym is an effective and easy way to exercise daily when you struggle to find time and motivation. By working out at home, you take the extra time and stress of going to the gym out of the equation, saving time and money.

So make exercise easier and more obtainable by creating your own personal home gym. Stock your home gym with the appropriate equipment, and start enjoying a workout in your own home.

The Top 7 Best Home Gym Investments for Strength Training

A home gym is a perfect solution to the issue of not getting enough regular exercise, but it can be challenging to determine what equipment you should buy and which equipment you may not need.

Take a look at the top seven best home gym investments for strength training to help guide you toward creating the perfect home gym that is right for you.

Adjustable Dumbbells

One of the best investments for strength training exercises you can do from home is adjustable dumbbells. Adjustable dumbbells are relatively inexpensive yet so versatile that you can use them to work every muscle group in your body.

Another great thing about adjustable dumbbells is that they don’t take up much space. They are the perfect addition to a home gym with limited space since you won’t need as many different sets of dumbbells to account for the different weights you need. They are easy to use, and storing them is never a problem.

You can easily get a full-body workout with just one set of adjustable dumbbells. You can use the lighter weights for upper body exercises and core workouts and the heavier weights for lower body and back exercises. 

DIY Homemade Dip Station

If you’re really strapped for cash and want something that you can build yourself, try creating a DIY homemade dip station for your home gym. Dips are a great workout for your triceps, shoulders, and back, but they take time to perfect. A homemade dip station would be perfect for gaining strength in your upper body and would fit nicely into a home gym.

To create a homemade dip station, you need wood, pipes, clamps, and screws. The best part of building your own home gym equipment is making it as big or small as needed to fit your space properly. Just be sure you have all of the pipes secured tightly with fitted collars to avoid potential injury from a flimsy pipe fitting.

A homemade dip station is also used for bicep workouts such as high pulls and pull-ups and can also work as a stability bar for performing other exercises that require balance.

Workout Bench

Another simple piece of equipment that is perfect for a home gym is a workout bench. Having a workout bench will make exercises easier to complete and helps keep your posture in good form. They are easy to install and often found in yard sales, garage sales, or various online secondhand retail stores like eBay.

A workout bench is excellent for completing workouts utilizing dumbbells, barbells, kettlebells, and standard core work. You can use it as a stepping stool for dumbbell step-ups, or if you’re working those glutes, a bench is a great workout tool for hip thrusts and split squats.

If you want to save even more money on your home gym, you can also DIY a workout bench. Use wood blocks, foam, and sweat-resistant fabric for the upholstery to create a workout bench that is perfect for your small space.

This is the perfect solution if you’re unsure if a traditional-sized workout bench would fit into your space since you can make it as big or as small as you’d like.
 
Resistance Bands

Resistance bands are perfect for quick, home workouts. They are easy to use, easy to store, and incredibly cheap.

Resistance bands are ideal for strength training those small muscles that tend to be difficult to grow because you’re creating resistance against the muscle. Still, the weight isn’t so heavy that you cannot work the muscle to failure, which is important for muscle growth.

Some other workouts you can complete with resistance bands include donkey kicks for your glutes, fire hydrants for your thighs, and overhead resistance band pull-aparts to grow your shoulder muscles and bicep curls. It’s amazing how many different muscle groups you can exercise simply using a set of bands.

When choosing the perfect resistance bands for your home gym, be sure to find a set that offers a few different resistance levels, and ones that are color coded for the different weights are also convenient.

There are also some with handles and some without. Resistance bands with handles are great for arms and upper body workouts, whereas booty and lower body workouts use bands without handles.

Punching Bag
 
Another great addition to a home gym that adds the opportunity for both cardio and strength training is a punching bag. You don’t often think of a punching bag as gym equipment, but you’d be surprised how many muscles you work when using one. 
 
Punching bags are small in size, so they fit into your home gym easily, are generally non-intrusive, and are easy to install. 
 
You can buy a punching bag at any local sporting goods store or make one yourself. Then, using wood, metal, or steel to hang the bag, you can simply install your own for a super inexpensive DIY version of a punching bag. Just be sure the bag is secure so that when you’re punching away, the bag stays tightly in place. 
 
A punching bag is also a great way to incorporate cardio equipment into your home gym without taking up too much additional space, like an elliptical or a treadmill would require. Building muscle strength may be your initial goal, but cardio is also very important for a well-rounded workout program that will help keep you healthy for many, many years. 
 
Virtual Personal Trainer
 
Another home gym investment that will help you increase your muscle strength while also keeping you motivated to reach your goals is a virtual personal trainer. 
 
A virtual personal trainer will create workouts tailored specifically for you and the goals that you are looking to achieve. Of course, you can have all the gym equipment in the world, but what good does it do you if you aren’t using it correctly?
 
Investing in a virtual trainer will give you a goal-oriented mindset and add more value to the home gym equipment you have already invested in. Personal training in a gym setting is expensive and calls for a trip to the gym every day. In contrast, a virtual personal trainer creates workouts for you virtually that utilize only the equipment you have available to you at home.
 
Having a virtual trainer also helps to hold you accountable for the workouts and adds a bit more of a personal touch to your program. It’s also helpful when you’re unsure whether you’re completing the exercises correctly, and it can help reduce your chances of getting injured while working out.

Kettlebells
 
Finally, when discussing the best home gym investments for strength training, we would be totally crazy not to include kettlebells. Kettlebells, like dumbbells, are easy to store, come in a variety of different weights, and are incredibly versatile. 
 
What’s more, you can use a kettlebell in place of two dumbbells in most cases, which is another reason why they’re great since you don’t need to purchase them in sets. 
 
Kettlebells are also good investments because they have handles that are easy to grip and perfect for people with weak wrists. In some cases, you can purchase them in different colors or styles, so it’s easy to depict which kettlebell is heavier or lighter than the other. 
 
Popular exercises that utilize kettlebells include kettlebell swings, lunge-to-arm presses, and teapot lifts, which are great for working your obliques! 
 
Before You Go
 
Creating your own home gym is the perfect way to invest in not only your home but also your health. You can get an effective workout from the comfort of your own home while still building just as much muscle strength as you do in the gym. 
 
The best home gym investments are things you can easily store to fit into a tight space, are versatile in their use, and can be made at home DIY for even more savings. 
 
So, stock your home gym today with these pieces of equipment for a fun, new way to work out and start seeing those muscle gains.

No Price Hikes due to Inflation at Cardio Trek


I have decided to keep my rates the same as they have been since June 2020. So despite the inflation that is going on elsewhere in the Canadian/North American economy, I will be keeping my rates the same.

So for example my Archery Lessons will continue to use the following rates:

1 Student, Weekdays or Weekends
$70 for 90 minutes; 3 Lessons - $200; 5 Lessons - $320; 10 Lessons - $620.

But there is one big change I would like to announce: I will now be accepting couples again. I ceased offering lessons to pairs/couples during 2020, but I will be resuming that in 2023.

The new couples rates are:

2 Students, Weekdays or Weekends
$100 for 90 minutes; 3 Lessons - $290; 5 Lessons - $470; 10 Lessons - $920.

Anyone looking for archery lessons in Toronto, regardless of what style of archery you want to learn, should contact me to learn more: cardiotrek@gmail.com

I teach the following styles of archery:

  • Traditional Recurve
  • Olympic Recurve
  • Longbow/Flatbow
  • Horsebow/Shortbow
  • Compound Archery

I do not teach crossbows, but I do know someone who does if that's your preference.

Happy Shooting!


Merry Christmas from Cardio Trek


Merry Christmas from Cardio Trek!

Looking for a last minute gift for a loved one? Get them archery lessons in Toronto!

Happy Halloween from Cardio Trek


Print out the above image to have a Spooky archery target this Halloween. Enjoy!


Arrow Hitting Bottle and Catapulting Back

 One of my archery students back in July sent me this GIF of their arrow hitting a bottle and then catapulting backwards. Seen in a loop it creates the impression that the arrow is hitting the bottle and just bouncing back and forth, while the lid goes flying each time.

Enjoy!


Photography Credit: Robin Kuniski / www.robinkuniski.com

Never Go Canoeing with a 5-Year-Old

Yesterday "for fun" I went canoeing with my mother and my 5-year-old son Richard.

I don't have any photographs of the lesson in physics because I was too busy keeping the boat upright and trying to prevent it from tipping over.

Canoes, if you're not aware, are a tad tipsy. A tad tipsy in this case means "very tipsy".

And 5-year-olds who don't like to sit still also don't like to listen.

This "comedy horror" experience is not for everyone. If you have any kind of heart condition, please (for the love of God!!!) DO NOT GO CANOEING WITH A 5-YEAR-OLD.

A ten year old? Sure. That sounds fine to me. A ten year old will have a better grasp of physics and that boats can tip over. A ten year old will also be better at listening and actually useful at using a paddle.

This is not to say a 5-year-old won't have fun in a canoe. My son Richard definitely had fun.

Meanwhile poor dad is having a heart attack whilst trying to keep the canoe upright and prevent said 5-year-old from tipping it over. Grandma also enjoyed from her position at the front of the canoe, but couldn't see their grandchild who keeps moving around every 10 seconds or so.

Then there's the matter of the wind.

Now you might not realize that canoes can be affected by the wind so much, but if the wind is strong enough it creates two factors:

1. If the wind hits the canoe broadside it rocks the canoe a bit, making it more tipsy.

2. The wind will make waves on an otherwise calm lake, leading to the waves rocking the canoe more strongly whenever the waves are coming parallel to the side of the canoe.

These two factors combined with an energetic 5-year-old who doesn't listen (and doesn't understand physics) leads to a catastrophic amount of tipsiness.

Is tipsiness a word?

It is now!

A Few Canoeing Tips

Always wear a life jacket in a canoe.

Never stand up in a canoe. (Again physics.)

Keep as much of your weight distribution towards the middle of the canoe as possible. A low center of gravity is best.

Whoever is in the rear of the canoe is the one in charge of steering. Everyone else gets to just paddle, unless otherwise instructed by the person steering the boat.

If possible wait until all occupants of the canoe are at least 10 years old before embarking on this (comedy horror) adventure.


Whitetail Deer at the Toronto Archery Range

Whitetail Deer

They're about 140 yards away, but there's three fawns and a doe in the photos below taken at the Toronto Archery Range. Just one of the benefits of practicing archery. You get to see wildlife on a regular basis.

Sometimes you can even get really close to them. I once got within 5 yards of a stag.

If you're at the archery range often enough you will see whitetail deer, red tailed hawks, foxes, raccoons, coyotes, rabbits, and more.

Depending upon the season + time of day I also recommend bringing mosquito repellent. That is one bit of wildlife we could do without.


A Beginner's Guide to Clout Archery

Look closely and you'll spot the arrows close to the flag pole shown in the photos on the right.

So what's the big deal?

Well, the flag is approx. 70 yards (210 feet) away from where the archery student was standing... And this was only their 5th archery lesson.

Oh and it was a tad windy that day.

That's why such results are worth taking photos of.

So what is Clout Archery?

Clout Archery is a long distance sport wherein archers compete to see who can get their arrows closest to the flag pole, which is generally placed really far away.

Usually 140 to 180 yards away, which are the competitive distances for Clout Archery.

However since the Toronto Archery Range is only 140 yards long (and lots of trees behind that) we have to use a shorter distance which is still challenging for a beginner, but also surprisingly a lot of fun.

Getting a cluster of arrows to land near the flag pole is also very challenging, even for experienced archers who are used to getting their arrows in clusters at shorter distances.

If you look closely at the photos on the right you will note that some of the arrows are touching or almost touching. That is some very good consistency for a beginner archer.

This isn't unheard of for my archery students however. I have periodically had students hit the flag pole or the flag itself at distances of 80 yards, 90 yards or more.

Getting to the point that you can do Clout Archery with this degree of accuracy isn't for beginners really. I generally only teach this to my archery students who sign up for 5 or more archery lessons.

When students sign up for 5 archery lessons they generally (I will sometimes customize the lessons for the needs of the student) get the following:

Lesson 1: Safety Lecture, Eye Test, Lecture on How to Aim Traditionally, Lecture on Proper Form, Field Archery Practice.

Lesson 2: Target Archery Practice, Lecture on Arrowheads.

Lesson 3: Long Distance Field Archery Practice, Lecture on Arrow Spine.

Lesson 4: Target Archery Practice, Lecture on How to Aim using Gap Shooting, Moving Target Practice.

Lesson 5: Clout Archery or Gap Shooting Field Archery (varies on the student).

Thus it really depends upon the student. Some students are more into learning Gap Shooting and others are more interested in long distance shooting.

Note - When someone signs up for 10 or more lessons I don't really have to choose so much. I will just teach them both, but I will still be customizing the lessons to the student's needs or interests.

Clout Archery Tips

Because the archer will usually have to aim at the sky in order to get their arrows to go that far you need to come up with a system for how to aim at the same spot on the sky.

Don't aim at clouds. They move. Instead you need to measure on the sky where you want to aim. I teach several different techniques for how to measure and aim at the sky so that students can choose which method works best for them.

Proper Form! If you don't know how to properly perform a shot then you should either get archery lessons or buy a book on the subject (I recommend "Precision Archery" by Steve Ruis & Claudia Stevenson).

And if you're in Toronto or the GTA you have no excuse not to get archery lessons from a dedicated professional like myself who teaches multiple different styles of archery and different archery sports like Clout Archery.

Browse the links below to learn more. Happy Shooting!

See Also

The Benefits of Clout Archery

Archery Lessons in Toronto


10 Things to do on a Mental Health Day

I don't usually talk about mental health on Cardio Trek, but I am going to do so today because I have decided to take a Mental Health Day. Think of it like a mini vacation. A day off to do something you enjoy that doesn't stress you out.

So with that in mind let's go through some of  my favourite activities to do on a Mental Health Day, and keeping in mind that I like to exercise so there will be a theme to this.

#1. Archery

I love archery. I find it very relaxing, despite it being a sport/exercise. I never get bored doing archery. I get tired and/or hungry and eventually have to leave the archery range because I need food, sleep, ice cream, a shower, etc. Creature comforts. But I am never bored while doing archery or socializing with my fellow archers (most archers are fairly social and talkative).

#2. Go to the Beach and Swim

If it is remotely warm outside (and not raining) then it is probably a good day to go to the beach and swim, walk along the beach, jog in the surf, etc. Take the dog with you. Take the kids. Have a fun time. Bring cold drinks and/or stop for ice cream.

#3. Make Ice Cream!

As you may have guessed I do like my ice cream, and while most ice cream certainly is not the healthiest you can also make low sugar / low fat alternatives that still taste amazing.

You can very easily make your own strawberry ice cream (not real ice cream, but the texture will be roughly the same) by mixing the following in a blender:

  • 10 ozs frozen strawberries
  • 4 ozs Greek yogurt 
  • 1 tsp honey or maple syrup
  • 4 fresh strawberries

Easy peasy strawberry squeezy! Afterwards you have a healthy snack you can take with you for a walk, to the beach, to the archery range, etc.

#4. Go for a Walk / Hike / Birdwatching

Where you go doesn't really matter. Walking trails. Abandoned railway tracks. The beach. I recommend taking a camera with you, or if you are into birdwatching (aka birding) then bringing a bird book with you is also a good idea. Even if you are not into birding then now is a good time to start getting interested in it. There are even apps on the subject if you don't own any birding books. (I am not going to recommend a particular app, but feel free to browse.)

#5. Shopping / Window Shopping

I love window shopping almost as much as I like actually buying things. Sometimes it is fun just to browse and look. Even for things you know you cannot afford, like when you walk into a Lamborghini dealership just to have a look. You aren't going to buy a Lamborghini, but it is still fun to walk around them, sit in them and talk to the sales staff (try not to waste their time however unless they look bored due to a lack of customers).

Shopping often deals with a significant amount of walking, and possibly carrying anything that you purchased, so there is oddly an exercise component and it can be quite exhausting by the time you get home with your new purchases.

One of my personal favourites is to go to bookstores and browse (and maybe buy a book). I don't need to buy any books to have fun and relax while shopping for books, but I certainly buy a lot of books judging by my shelves. I also like garage sales and used book stores because you never know what you are going to find. In Toronto check out the store "Re: Reading" on the Danforth. 

Another one I really like is furniture shopping. Mostly because you get to sit on the furniture and it is therefore relaxing, but there is still a goodly amount of walking involved. Plus maybe you finally replace that sofa you've been meaning to throw out, so that could be a win-win.

#6. Ice Skating

In the winter it is a great time to go ice skating, and in a city like Toronto there are many free outdoor ice rinks to choose from. The one in front of Toronto City Hall for example offers skate rentals and lockers so that you can enjoy the activity even if you don't own skates you can still do it. Plus you don't need to be good at ice skating to have fun doing it. It is still fun regardless even if you are horrible at it.

#7. Rollerblading / Roller Skating

Other times of the year you can still skate, but the method is different. It might involve going to a roller rink and renting roller skates or rollerblades, but just like ice skating this is something you can have fun doing even if you are horrible at it.

For best results take a friend or family member with you!

#8. Go Fishing

Not for everyone, but regardless of whether you don't catch anything, catch-and-release, or eat what you catch you will still have a relaxing time.

#9. Antiquing

Similar to shopping, antiquing is when you go to many different antiques stores and browse. Antique store owners are used to people browsing and not buying anything so what you're doing isn't really that unusual.

#10. What is your favourite hobby?

Chances are you have a favourite hobby. Why not spend the day doing it? Just relax and do that one hobby that makes you really happy. As long as the hobby isn't harming you or anyone else, and isn't stressful, then it should be a good way to relax.

Happy Mental Healthy Day!

Students who don't Listen

Today I had a bonding experience with a fellow archery instructor during which the topic of "students who don't listen" came up. For me this experience of commiserating with a fellow archery instructor was cathartic.

What is the point of getting archery lessons (or any other kind of lesson) if you're not going to listen to the instructor?

There is nothing more annoying to an instructor than trying to teach someone who refuses to listen. I have, historically, refunded lessons to people who didn't listen and I didn't want to bother teaching them.

Especially if I considered them to be a danger to themselves and others. It would be irresponsible, in my opinion, to teach someone I consider to be dangerously ignorant and refuses to correct their mistakes or listen to the instructor.

This is one of the reasons why I rarely teach children any more. There is a measure of responsibility and maturity on the part of the student that needs to be there before I even agree to teach archery to a child... And if they later turn out to be the type of person who doesn't listen then guess who is getting the remainder of their lessons canceled and refunded*...?

* Partly because of liability issues in which I don't want to be legally responsible for a child (or adult) who is a danger to themselves and others. So this isn't really a choice for me. It is basically a legal requirement on my part to be responsible about who I choose to teach.

As noted by my colleague and myself, this problem of students who don't listen is mostly an issue of children who lack maturity. It is rare to meet an adult with this particular problem, although not unheard of. I sometimes come across an adult or even a senior who has become set in their ways and doesn't want to listen, even when they know it is in their best interest to do so.

The problem I find often stems from students thinking that they know more than the instructor because they have been watching too much television/movies, did archery at summer camp with someone who didn't know how to teach archery, or they've bought into misinformation about the sport they learned from other sources (fictional books, YouTube, Facebook, etc). This is why, in my opinion, it is often better to teach a student who is a blank slate. The less misinformation they have previously received the better.

Just because you saw a cartoon character doing archery a certain way doesn't mean that you know more than the archery instructor. You don't. Get over it.


Trying to teach someone like that also makes me want to pull my hair out in frustration. I don't need the added stress. My knee jerk reaction to meeting a student who doesn't want to listen is to cancel the lessons and refund the money. The liability and the stress just isn't worth it.

Plus why take lessons in something that you don't want to learn???

I get it when parents sign up their kids for ice skating lessons or swimming lessons... And the child would rather be looking at their cellphone than paying attention to the lesson. But if the parent knows that their child isn't actually interested then you should just find them a different activity that does interest them. Not every child wants to swim, do ice skating or archery. Find them something else they actually want to do. Tae kwon do lessons perhaps. Rock climbing. Krav maga. Golf. Violin. Ballet. Parkour.

Don't force them to do a sport they're clearly not interested in.

Shapesmiths, Fitness Coaches and Personal Trainers

I learned a new word today:

"Shapesmith"

 Apparently it is an older version of saying fitness coach or personal trainer. The word Shapesmith appears in Dr. Johnson's English dictionary, which was published in 1755. He defined the shapesmith as “one who undertakes to improve the form of the body".

But that could also mean someone who is an athlete too, couldn't it? So to some extent it represents someone who is both an athlete and/or a fitness coach.

I see myself as more of a sports trainer, seeing as my goal is to get people "in shape" by encouraging them to get better at various sports like archery, boxing, swimming, ice skating and others.

I find that motivation is an important part of exercising - and getting into the practice, rhythm and habit of exercising - and that if you can make exercising fun via sports then it is far easier for people to get motivated and stay motivated.

Furthermore a person doesn't necessarily need a personal trainer (or fitness coach or shapesmith) in order to do sports, but when it comes to certain sports like archery, swimming, ice skating and boxing then it definitely helps to have someone who can coach you on how to do it properly. 

... 

For reference, I learned the word shapesmith by watching an episode of QI (season J, episode 4), which you can watch below thanks to YouTube: 


The Benefits of Practicing Clout Archery

Clout Archery is a sport in which archers compete at shooting a "clout of arrows" as close to a target flag pole as possible, often at really long distances such as 140 or 180 yards away.

For people new to clout archery (or when the field is shorter than desirable) you may want to use shorter distances such as 60, 70, 80 yards, etc. Or if you have a really large field available, you could even try shooting longer distances like 200 yards or more.

The image below shows the results of 1 round of shooting with one of my archery students recently on June 4th 2022, shooting at a distance of 60 yards (180 feet). She got two clusters near the flag pole as you can see, nearly hitting the flag pole despite windy conditions that day.


Which brings me to the topic of what makes Clout Archery something that is useful to learn:

#1. Clout Archery is really good for archers learning how to adjust for wind conditions.

#2. Clout Archery is very good at teaching people how to shoot long distances accurately, with the distances often being more than that used by Olympic archers (70 meters).

#3. Because shooting long distances magnifies any mistakes the archer makes it forces the archer to be more of a perfectionist than shooting short distances in comparison.

BONUS THOUGHTS

Shooting such long distances can also be quite fun as there is a level of joy in watching an arrow fly so far and yet manage to land near the flag pole (or on rare occasions, even hit the flag pole).

For extra fun you can also use whistling arrowheads.

To make it easier to find your arrows (depending on the distance) you can also use wingnuts behind your screwed on field points so that when they hit the ground they dig in like an anchor and are easier to find. Alternatively, you can also use large (flu flu) fletching on your arrows.

Clout Archery Lessons?

Anyone wanting to learn archery (and specifically Clout Archery) can sign up for archery lessons in Toronto and mention that you want to learn Clout Archery.

How to Fix Holey Archery Targets


As time goes by eventually your archery targets will get holey (or fall down) in which case you either need to replace the material or repair it in some manner.

Repairing Natural Tentest Targets

In the case of Natural Tentest targets, like those at the Toronto Archery Range located at E. T. Seton Park shown above, one way to repair the big gaping holes is to wait until one of the target butts collapses and falls down - often due to heavy rain and/or wind - and then you can use the broken fallen pieces of Natural Tentest to stuff the holes in the other targets.

And for fun, you can also add a large water container to the target butt which collapsed so that people can still potentially shoot at something until that target's tentest is replaced.

Repairing 3D Targets

In the case of 3D targets (deer, raccoons, etc) that are popular with hunters one of the best ways to repair them is with foam, like in the video below. What brand or style of foam you use doesn't really matter, what is really important is that you don't overfill the holes you are repairing because otherwise excess material will leak out (as demonstrated in the video below). A "less is better" approach is best for that scenario.

Repairing DIY Cardboard Targets

The beauty of cardboard targets is that they're super easy to repair and cost effective. Just make a habit of saving any large pieces of cardboard from your home and/or workplace and you can easily just rip out any damaged pieces of cardboard from your DIY targets and replace with new cardboard.

Best of all, the old cardboard is still recyclable so it has simply been reused before eventually reaching the recycling bin.

Your cardboard archery target doesn't need to be fancy either (like the one in the image below). It simply could be a cardboard box which is filled with cardboard. Having a wooden frame is really unnecessary for most people's purposes. But once you have a cardboard target they're very easy to repair.


Happy Birthday to Arthur

PERSONAL NOTE

My wife, myself and my eldest son would like to announce the birth of our new boy Arthur. So if you see me in person do feel free to congratulate me on the birth of the newest member of our family.

I look forward to him learning archery, swimming, ice skating, etc in the years to come.


How Boxing Gloves Changed the Sport

During a 150 year period of bare knuckle boxing there were only ever 2 recorded deaths, thanks to boxers avoiding punching their opponents in the face (because it hurt their hands). After the introduction of boxing gloves the number of deaths in boxing rings skyrocketed.

While the data for that time period is probably incomplete due to a lack of record keeping by newspapers and the media of the day, it is pretty clear that deaths from boxing were pretty rare at the time.

Fast forward to the present.

In the USA alone approximately 4 boxers die per year due to injuries sustained in the ring. Usually the result of head or neck injuries because boxing gloves paradoxically increased the number of deaths in the ring by allowing boxers to focus more on punches to the head without fear of injuring their hands. In other words a device meant to make boxing "safer" by protecting the hands of boxers actually causes far more deaths by causing more head/neck injuries.

Modern boxing gloves also play an important role in many boxers suffering brain injuries and eye injuries.

This makes in my opinion a good argument for why we should go back to bare knuckle boxing... In which case we would have more hand injuries, but less deaths.

The way boxing was conducted during the bare knuckle boxing period was also significantly different from modern professional boxing. There was a lot more punches to the upper torso, but boxers habitually avoided the face. Today it is practically the opposite.

After the introduction of padded boxing gloves when the Marquis of Queensbury Rules were drafted in 1865, and later officially adopted in 1892, they evolved over time. Originally they were nearly skin tight and weighed a mere 2 ounces.

Over time they have become heavier and more padded, with 8 ounce gloves becoming banned by AIBA in 1994, after which only 10 ounce or 12 ounce gloves were allowed (depending upon weight class and gender).

The very first padded boxing gloves were invented in 1743, but were only used for sparring and training, and not allowed in actual boxing matches.

Prior to that period "boxing gloves" technically did exist, but they were often fitted with blades or spikes, making them more like weapons of war than they were for boxing matches. The Ancient Greeks for example used leather wraps called Caestus.

There are also many different types of boxing gloves these days, produced by over 30 makers of professional boxing gloves:

  • Bag Gloves
  • Bag Mitts
  • Sparring Gloves
  • Competition Gloves
  • Lace Up Gloves
  • Weighted Training Gloves
  • Illegally Modified Boxing Gloves (see the Carlos "Panama" Lewis case for an example)
  • MMA Grappling Gloves (technically not boxing gloves, but listed here for reference)

As a boxing instructor I would say that I enjoy boxing as a form of exercise and I appreciate it as a sport, but I would never compete as a boxer because I like my eye balls and my brain in their current condition.

There is nothing wrong in my opinion in learning how to throw a proper punch. It can be very useful for self defense, and hopefully that never happens to the majority of people, but for the people who just want to exercise and learn an useful skill then boxing is certainly an option.

And wearing boxing gloves while you are training is definitely a necessity, even if they are more likely to cause deaths in the ring.

For now the genie is out of the bottle, the cat is out of the bag, and there's no getting boxing gloves out of boxing. It is too much a part of the sport these days. What I could foresee eventually happening is the banning of head punches, for the same reason why neck punches aren't allowed.


Ikigai and the Archer

About one year ago my colleague Steve Ruis wrote a blog post called "The Ikigai of Archery".

Ikagai is a Japanese word which means "live reason" or "reason to live".

Basically Ikagi is when you have something that helps you get out of bed in the morning and provides a purpose or meaning in your life is certainly helpful.

Can archery be a reason to live?

I believe so.

Sometimes we just don't want to get up in the morning, but we force ourselves to do so because we have to get to work - often to a job we dislike.

I am fortunate that I have a job I really enjoy and love to do. There are many people out there who wish they could quit their regular jobs and just do what they love to do.

Even so there are definitely days when I am excited to teach archery and do some personal practice, and then there are other days when I have to go to work and I would rather stay home if I had the choice.

I find the quality of sleep I got the night before is a factor.

Same thing goes with my students. I can tell based upon their focus and the quality of their shooting whether they didn't sleep well the night before - or worse, if they're hungover, distracted by something, stressed or upset, hungry, etc.

And yet they still got up and they came to their archery practice because it was something they wanted to do, because they deemed it important, and quite possibly they were excited about it.

Thus in this case I think Ikigai is an excellent word, and an apt word. If archery can be the crutch that helps people get up in the morning - and in some cases to strive and find purpose in their lives - then so be it. Sometimes people need a crutch to help them to keep on surviving so they can find other reasons to live.

I believe people can have multiple reasons to live, including an important one: Family. Speaking for myself then my wife and my son are two of my biggest reasons to live, but archery is another. As is writing. I have many reasons to live.

For my students who are curious about the more spiritual sides of archery I usually recommend two books:

1. Zen Bow, Zen Arrow
2. The Unfettered Mind

The 2nd book isn't actually about archery. It is about Zen Buddhism and swordsmanship, but also about being a good person who learns to manage their thoughts and emotions. So while it is primarily about swordsmanship, the principles described in the book also apply to archery.

Years ago I even published my own book of poetry on the subject, a book called "Dreaming of Zen Archery". (The ebook version is $2.99 if you're curious about it.)

So yes, I believe archery can be an Ikigai - a reason to live.

It doesn't have to be your sole reason to live however, but it can be the crutch that keeps you moving forward until you find other reasons.

Accepting New Archery Students for 2022

Hello Toronto!

Do you want to learn archery? Of course you do, you're here reading this aren't you?

Well, the good news is that I am accepting new students for the 2022 archery season.

Contact cardiotrek@gmail.com to book your archery lesson(s) today. When in doubt I recommend starting for 3 lessons for $200. See my archery lessons page for more details / discount rates / etc.

So what's so special about my archery lessons?

#1. I make them fun and informative. So you're learning, but you get to have fun while doing so.

#2. I have been teaching archery so far for 13 years (and doing archery for 33 years). Suffice to say I have been doing this for a long time and have learned some of the best ways

#3. I have published articles over the years in "Archery Focus Magazine", which recently released their final issue in November 2021. (My article "Gap Shooting: Aiming for Versatility" was included in the final issue.)

#4. Browse my Archery Lessons Plan to learn more about the how each lesson is different.

#5. One on one lessons. No group lessons. You get personalized attention from an archery coach and I tailor the lessons to meet my individual students needs.

#6. I also teach people with adaptive archery needs. So if you're in a wheel chair or have other difficulties, not to worry, you can still do archery. Just email me to discuss your situation.

#7. People over 65 get a 10% Seniors Discount and people from Canada's armed forces get a 10% Veterans Discount.


Merry Christmas from CardioTrek 2021

 Merry Christmas from CardioTrek 2021!

 And have a Happy New Year in 2022!


Jogging 30 Day Challenge: What Happened?

You may recall that earlier this year I embarked upon a "Jogging 30 Day Challenge" and then it suddenly stopped?

Well, I was about 20 days into it and injured my foot. I am not even certain HOW I injured my foot. I woke up one morning and my right foot was suddenly in a lot of pain, similar to a "Charley Horse" in terms of the amount of pain I was in.

But unlike a Charley Horse / foot cramps, it didn't go away after a few minutes.

It took months for my foot to start feeling like normal again, and even now I sometimes experience pain in my right foot.

So that's why my "Jogging 30 Day Challenge" ended unexpectedly.

I am hopeful to resume jogging sometime, but in the meantime I want to be fully healed before I do so.

I don't recommend anyone jogging when you have a sports injury in your feet or legs. Same with any other sports injury. If you have an injury it is your body telling you it is time to take a break.


Archery Student Pierces String on Moving Target


Above is a photo of one of my archery students after she successfully pierced the string on a moving target. It was her 6th lesson.

I usually start teaching how to shoot at moving targets on the 4th lesson or later, but actually splitting or piercing the string on a moving target is very rare. More rare than "Robin Hooding an arrow", which is when you pierce your own arrow in the end of the nock.

How to make a Moving Target

I find one of the easiest ways to make a moving target is to use an empty water bottle and dangle it from a string. The water bottle blows in the wind fairly easily, but not so easily that it is impossible to hit if you're good at it.

When dangling the bottle from the string you want to offset it from the target. A broken arrow or a stick inserted into the target works well. If you do not offset the moving target then it will rub against the target and the friction will reduce how much the bottle moves about.

How to make it easier...

If you want less of a challenge you also use a larger bottle. Eg. A 2 liter Coca-Cola bottle is a great size if you want something less challenging. If you want to make it even easier pick a day to shoot when there is very little wind.

How to make it harder...

Cut the bottle in half. Or only use just the bottle cap. The moving bottle cap makes for a very difficult target to hit. If you want to make it even harder try to do it on a windy day.

But not impossible.

I did it twice in one day (back in 2015) when I brought a tripod and a camera to the archery range. The first time however the camera stopped recording so I didn't actually manage to record it. The second time however the camera did record it properly. Thankfully it wasn't too windy that day.

Anyone wishing to book archery lessons in Toronto for 2022 should feel free to contact me. Better to contact me sooner to start booking your lessons.


5 Tips for Gaining Muscle Mass Faster

As a bodybuilder or a keen gym-goer, you'll know that there are plenty of things you can do to gain muscle mass. However, if you are looking to gain muscle fast, this is where it becomes difficult. Since muscle growth is naturally a slower process than fat gain, you'll need to make some specific changes to your diet and training routine. If you want to gain muscle mass fast, here are some tips you can use.

Start from a Low Body Fat Level

Experts suggest that starting your muscle-building journey from a lean state will help you to maximize results. For men, you want to be at 10% body fat or lower, and for women, you should be at 16% or less. If your body fat percentage is any higher than this and you start to try and build muscle mass by consuming more calories, you are simply feeding a metabolism that is increasing body fat stores. Instead, the leaner you are, the more likely it is that your body will use these calories for training, muscle growth, and recovery. This leads us to our next point.

Add More Calories Gradually

As you probably already know, gaining muscle requires consuming more calories than you burn off. Since you need to be in a calorie deficit for losing weight, the opposite is true for bulking up. However, there is a delicate balance you need to reach when it comes to increasing your caloric intake. Too much, and you risk excessive body fat being gained instead of muscle. The best advice is to gradually increase the amount you eat so that you can carefully monitor your weight gain and achieve the right muscle growth to fat gain ratio.

Consider Natural Steroids

Anabolic steroids are currently illegal in the US and possession of them can land you with a hefty fine and even a prison sentence in some situations. There are also many nasty side effects, such as infertility, breast development, and an increased risk of prostate cancer, so it's just not worth the risk. However, there is good news for those wanting to gain muscle mass fast in a safer way. You can try turkesterone instead. This is a natural ecdysteroid found in plants and insects. There are said to be many health benefits related to turkesterone, including increased muscular endurance, improved recovery time, and improved body composition. It can even help with improving cholesterol and glucose levels.

Workout Sessions Should Be Frequent but Less Intense

While the temptation might be to simply create more intense workouts, research suggests that this isn't always the best route to take. Instead, you want to work out more frequently without pushing yourself too hard. This avoids injury and excessive soreness. For example, if you planned to focus on training your legs in just one session per week, you'd need to do a high number of low stimulus reps. However, spreading the reps over several sessions allows you to move more weight and reduce the stress you are putting on your body.

Eat More Protein and Carbs

It goes without saying that protein is vital for muscle growth. You need to consume around 1 gram of protein per pound of body weight when you are trying to bulk up. However, it is also important to get enough carbs. While the muscles can use protein for energy, carbs are required if you want energy for high-intensity workouts. Here, it is recommended that you consume between two and three grams of carbohydrates per pound of bodyweight.

Gaining muscle fast requires eating the right foods and devising the right workout. Use these tips to help you along your journey.

Looking to sign up for archery lessons, boxing lessons, swimming lessons, ice skating lessons or personal training sessions? Start by emailing cardiotrek@gmail.com and lets talk fitness!

Followers

Popular Posts

Cardio Trek Posts